시나리오 : 금융 회사에서는 여러분에게 현재 온-프레미스에 있는 두 파일 공유를 복제하도록 요청했습니다. 이 회사는 보고서용 파일 공유와 애플리케이션 데이터용 파일 공유를 하나씩 사용합니다. 스토리지 계정은 데이터 센터 오류에 대해 복원력이 있어야 합니다. 이 때문에 이 계정을 만들어 GRS 중복성을 사용합니다.
순서는 아래와 같다.
1. GRS (SKU) Storage Account 만들기
2. File Shares 만들기
3. Windows VM 을 만들고 이 서버에 연결
4. Map drives to the Azure file shares
5. Test the mounted Drive
6. Enable secure file transfer
7. Add a firewall rule to restrict access to an IP address
8. Test security of the file share
GRS (SKU) Storage Account 만들기
1. Azure CLI 로 Storage Account 만들기
export STORAGEACCT=learnazurefileshare$RANDOM

az storage account create \
    --name $STORAGEACCT \
    --resource-group learn-31e70a13-27da-432b-becd-383b5bc071f6 \
    --sku Standard_GRS
{- Finished ..
"accessTier": "Hot",
"allowBlobPublicAccess": null,
"azureFilesIdentityBasedAuthentication": null,
"blobRestoreStatus": null,
"creationTime": "2021-01-20T00:45:53.602386+00:00",
"customDomain": null,
"enableHttpsTrafficOnly": true,
"encryption": {
"keySource": "Microsoft.Storage",
"keyVaultProperties": null,
"requireInfrastructureEncryption": null,
"services": {
"blob": {
"enabled": true,
"keyType": "Account",
"lastEnabledTime": "2021-01-20T00:45:53.680513+00:00"
},
"file": {
"enabled": true,
"keyType": "Account",
"lastEnabledTime": "2021-01-20T00:45:53.680513+00:00"
},
"queue": null,
"table": null
}
},
"failoverInProgress": null,
"geoReplicationStats": null,
"id": "/subscriptions/c9c4cc6e-2adb-4f59-bbd1-4f966e547bd0/resourceGroups/learn-31e70a13-27da-432b-becd-383b5bc071f6/providers/Microsoft.Storage/storageAccounts/learnazurefileshare2021",
"identity": null,
"isHnsEnabled": null,
"kind": "StorageV2",
"largeFileSharesState": null,
"lastGeoFailoverTime": null,
"location": "westus",
"minimumTlsVersion": null,
"name": "learnazurefileshare2021",
"networkRuleSet": {
"bypass": "AzureServices",
"defaultAction": "Allow",
"ipRules": [],
"virtualNetworkRules": []
},
"primaryEndpoints": {
"blob": "https://learnazurefileshare2021.blob.core.windows.net/",
"dfs": "https://learnazurefileshare2021.dfs.core.windows.net/",
"file": "https://learnazurefileshare2021.file.core.windows.net/",
"internetEndpoints": null,
"microsoftEndpoints": null,
"queue": "https://learnazurefileshare2021.queue.core.windows.net/",
"table": "https://learnazurefileshare2021.table.core.windows.net/",
"web": "https://learnazurefileshare2021.z22.web.core.windows.net/"
},
"primaryLocation": "westus",
"privateEndpointConnections": [],
"provisioningState": "Succeeded",
"resourceGroup": "learn-31e70a13-27da-432b-becd-383b5bc071f6",
"routingPreference": null,
"secondaryEndpoints": null,
"secondaryLocation": "eastus",
"sku": {
"name": "Standard_GRS",
"tier": "Standard"
},
"statusOfPrimary": "available",
"statusOfSecondary": "available",
"tags": {},
"type": "Microsoft.Storage/storageAccounts"
}2. Storage Account Key 저장
STORAGEKEY=$(az storage account keys list \
    --resource-group learn-31e70a13-27da-432b-becd-383b5bc071f6 \
    --account-name $STORAGEACCT \
    --query "[0].value" | tr -d '"')
File Shares 만들기
1. 금융회사의 보고서를 저장할 File Share를 만듦
az storage share create \
    --account-name $STORAGEACCT \
    --account-key $STORAGEKEY \
    --name "reports"
2. 금융회사의 application data를 저장할 File Share를 만듦
az storage share create \
    --account-name $STORAGEACCT \
    --account-key $STORAGEKEY \
    --name "data"
Windows VM 을 만들고 이 서버에 연결
금융 회사의 데이터 센터 또는 지점에서 실행되는 온-프레미스 머신을 시뮬레이션하는 Windows Server VM을 만든다.
1. Azure CLI를 사용하여 Windows VM을 만든다. 암호를 입력하라는 메시지가 표시되면 선택한 복잡한 암호를 입력하고 나중에 참고할 수 있도록 따로 적어둔다.
az vm create \
    --resource-group learn-31e70a13-27da-432b-becd-383b5bc071f6 \
    --name 2019FileServer \
    --image Win2019Datacenter \
    --admin-username azureuser
{- Finished ..
"fqdns": "",
"id": "/subscriptions/c9c4cc6e-2adb-4f59-bbd1-4f966e547bd0/resourceGroups/learn-31e70a13-27da-432b-becd-383b5bc071f6/providers/Microsoft.Compute/virtualMachines/2019FileServer",
"location": "westus",
"macAddress": "00-22-48-0A-61-C7",
"powerState": "VM running",
"privateIpAddress": "10.0.0.4",
"publicIpAddress": "40.80.159.132",
"resourceGroup": "learn-31e70a13-27da-432b-becd-383b5bc071f6",
"zones": ""
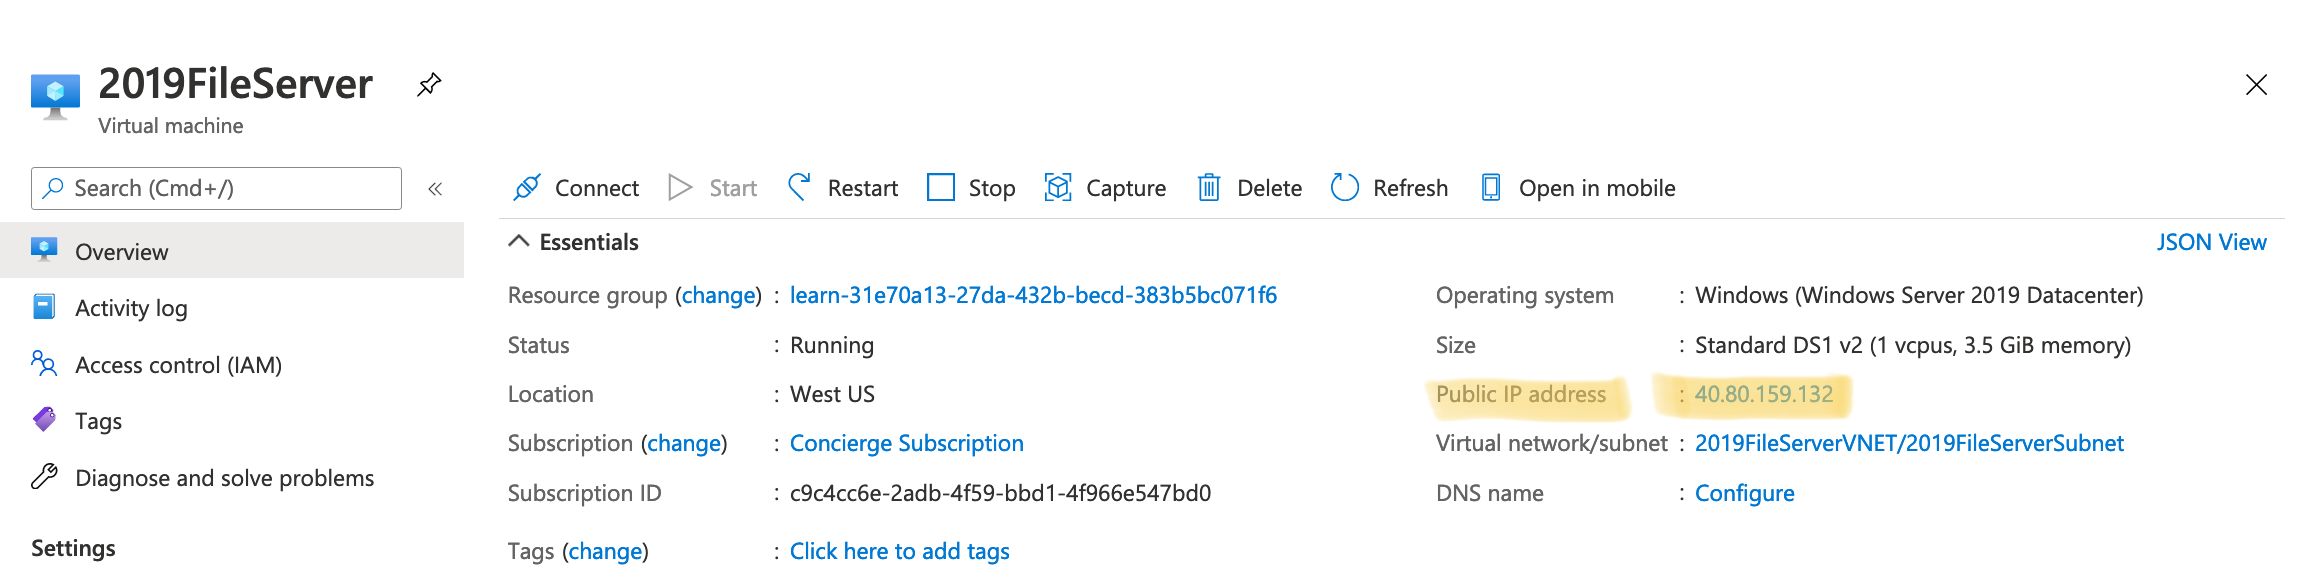
}2. 샌드박스를 활성화하는 데 사용한 계정으로 Azure Portal 에 로그인합니다. 포털 메뉴에서 All Service > Virtual Machine을 선택합니다. 그런 다음 만들었던 2019FileServer VM을 선택
3. Overview 창에서 Connect > RDP 를 차례로 선택한 다음 RDP 파일 다운로드 를 선택
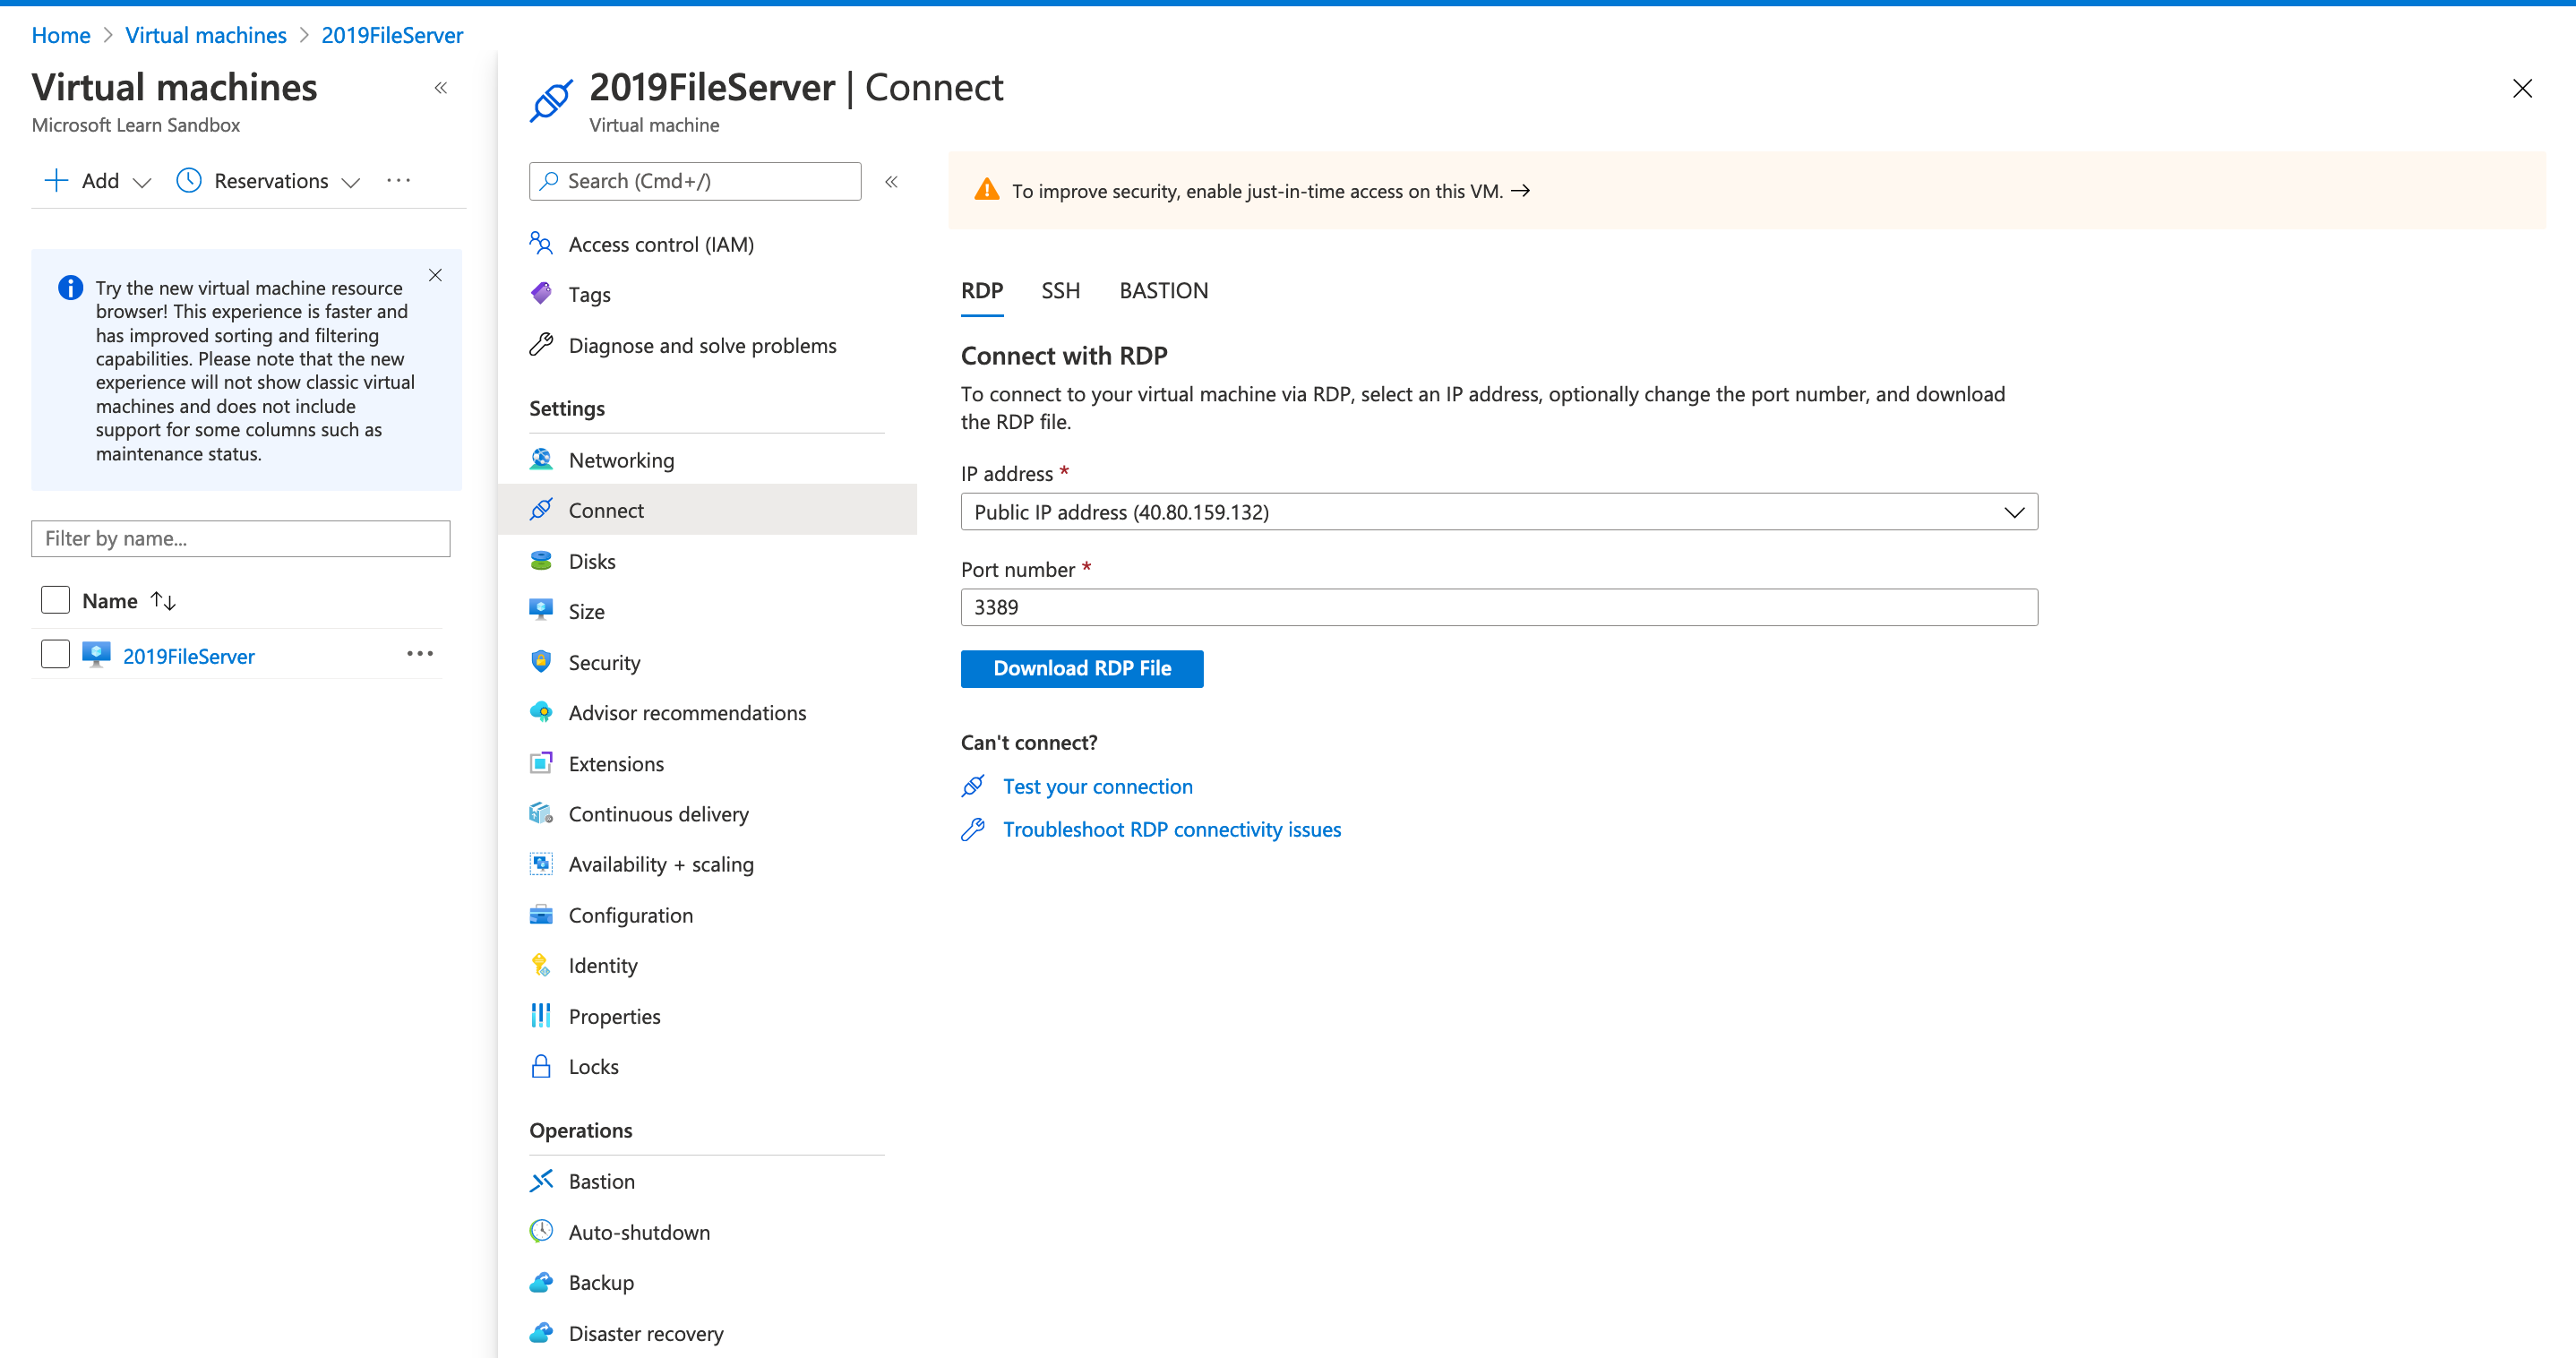
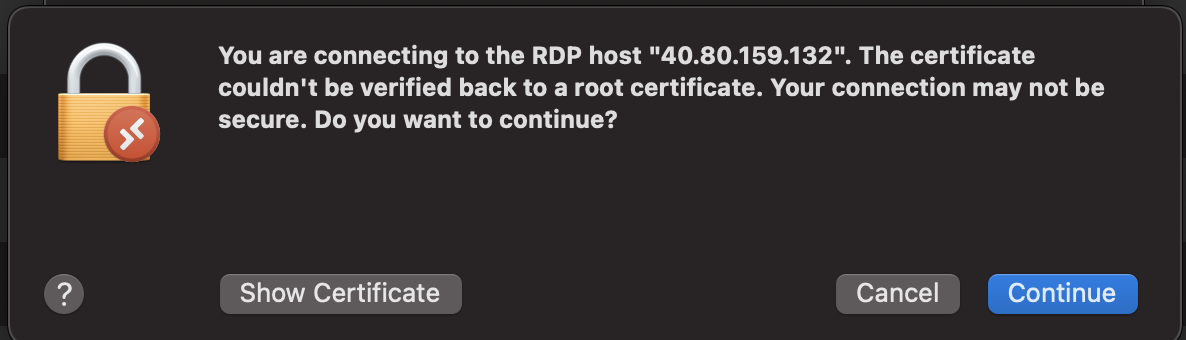
4. RDP 파일을 실행하고 메시지가 표시되면 Connect 을 선택합니다.
Mac 의 경우 실행이 어렵기 떄문에 Microsoft Remote Desktop 을 앱스토어에서 다운받았다
그 후에 VM public IP 를 이용해서 원격 서버에 접속을 한다.
Add PC 를 클릭한 후 PC name 에 포털에서 나온 Public IP 를 넣어주고 Add 를 클릭

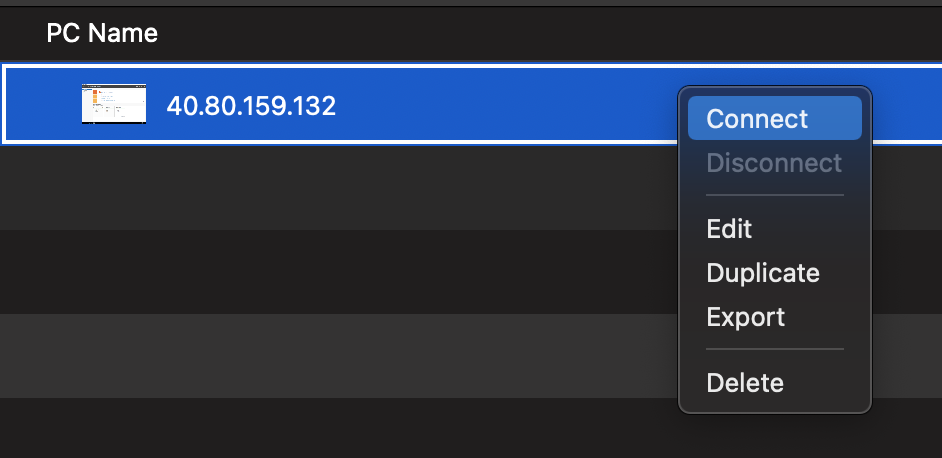
오른쪽 클릭 후 Connect
5. Username 과 Password를 입력한다. 아까 vm 만들때 설정한 것 쓰면 된다.
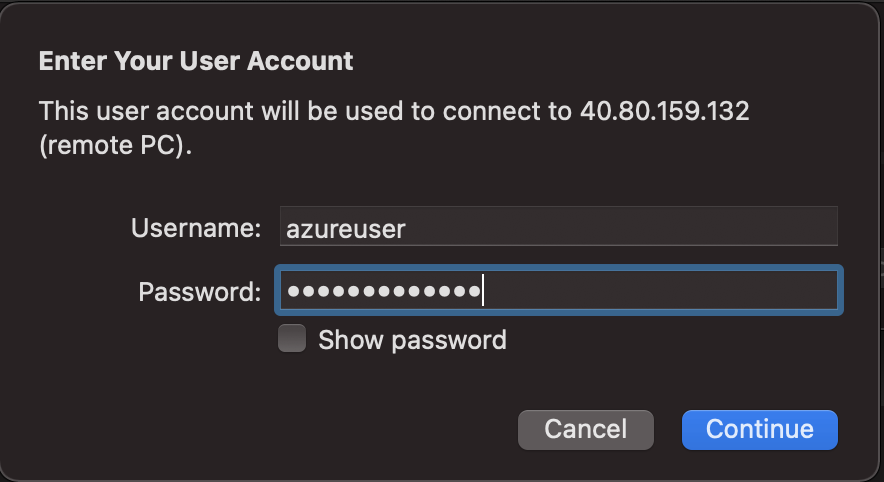
continue 를 눌러서 윈도우 가상 머신에 연결한다.
Map drives to the Azure file shares
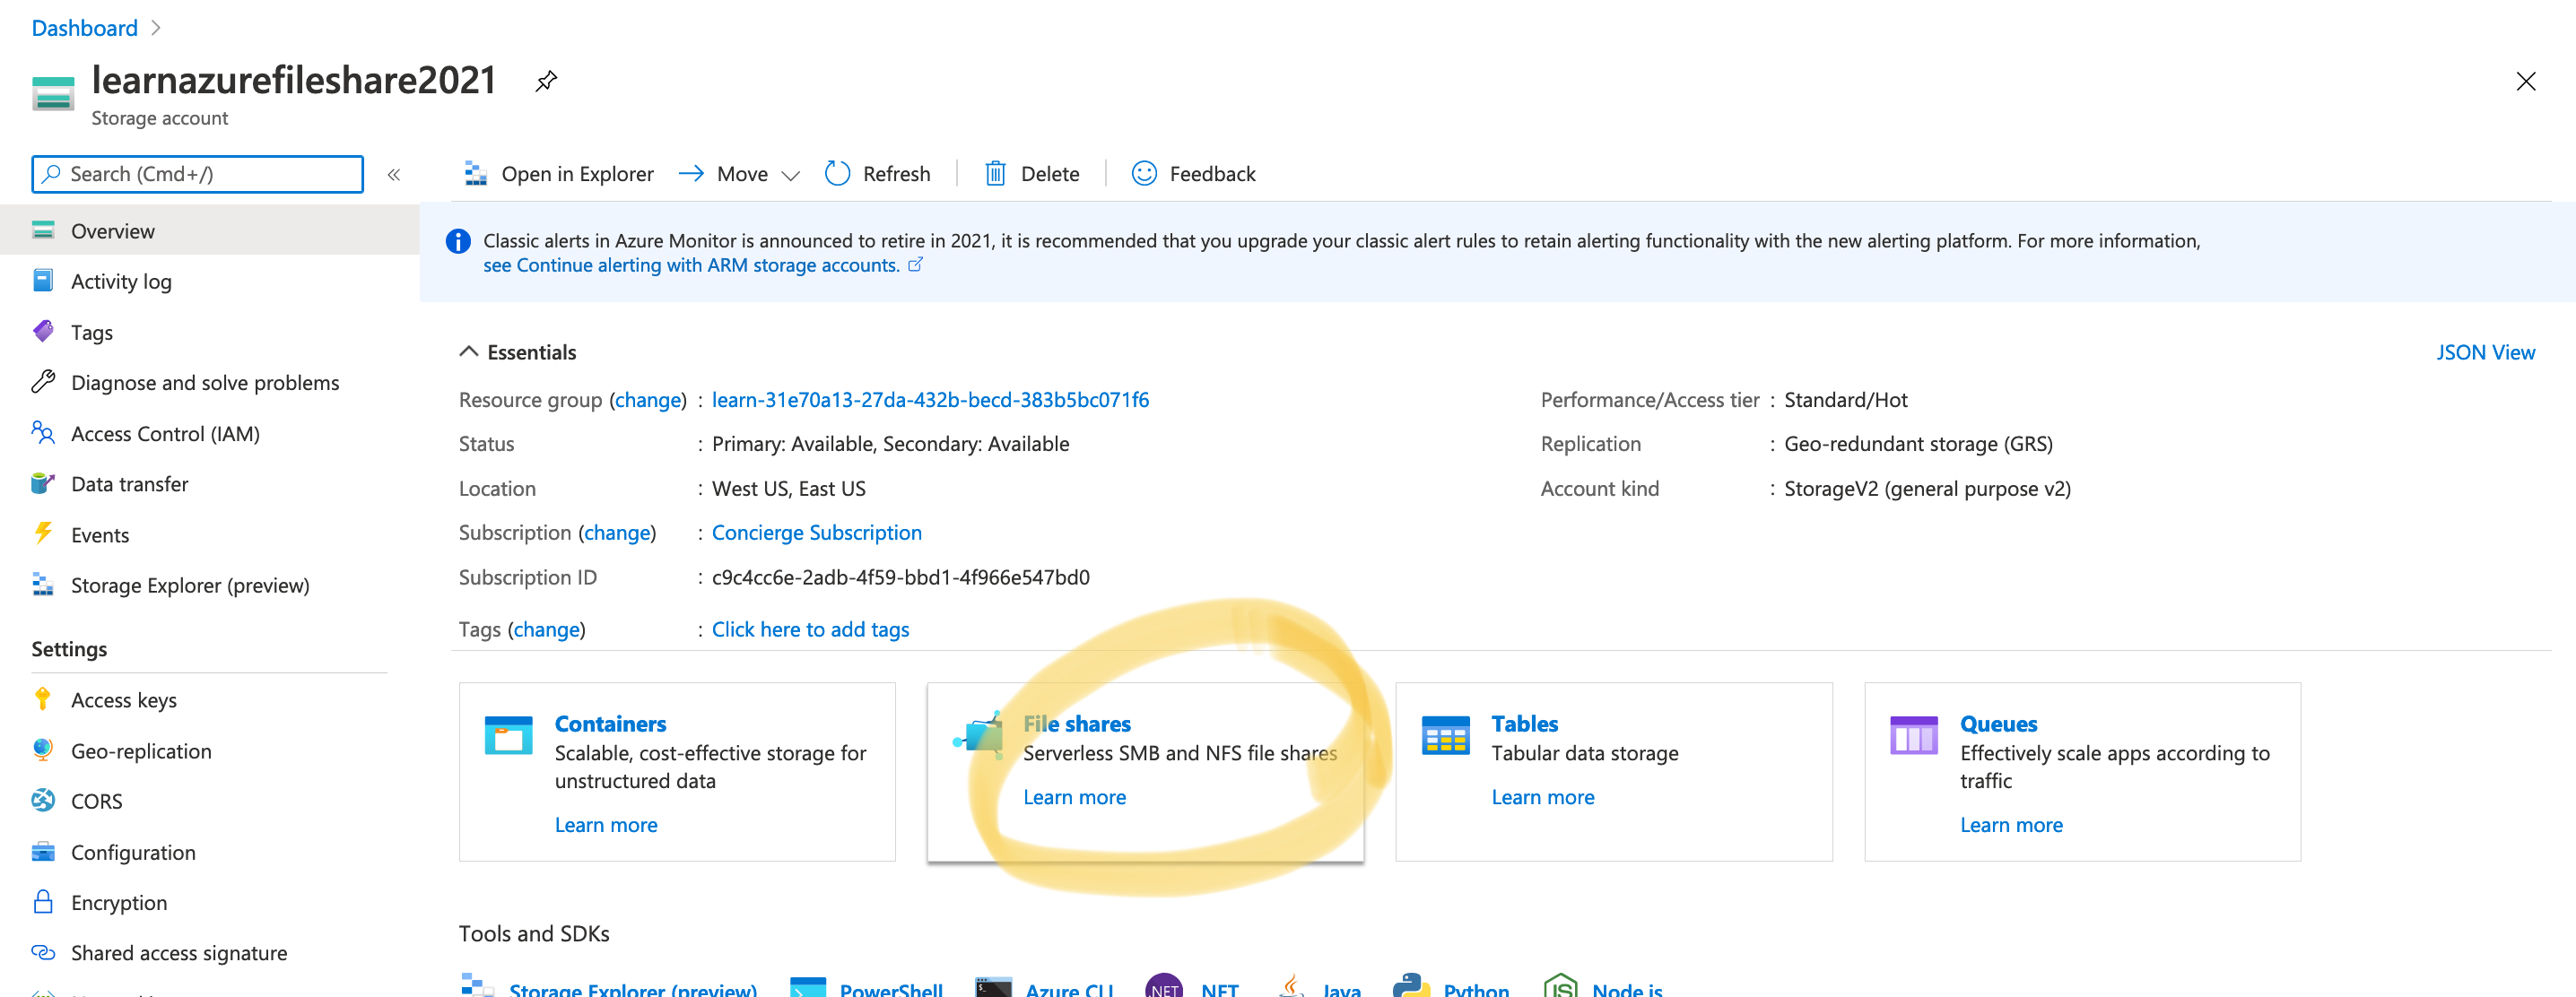
1. Azure Portal의 포털 메뉴에서 Storage Account 을 선택하거나 검색
2. 처음에 설정한 Storage Account 선택 : learnazurefileshare2021
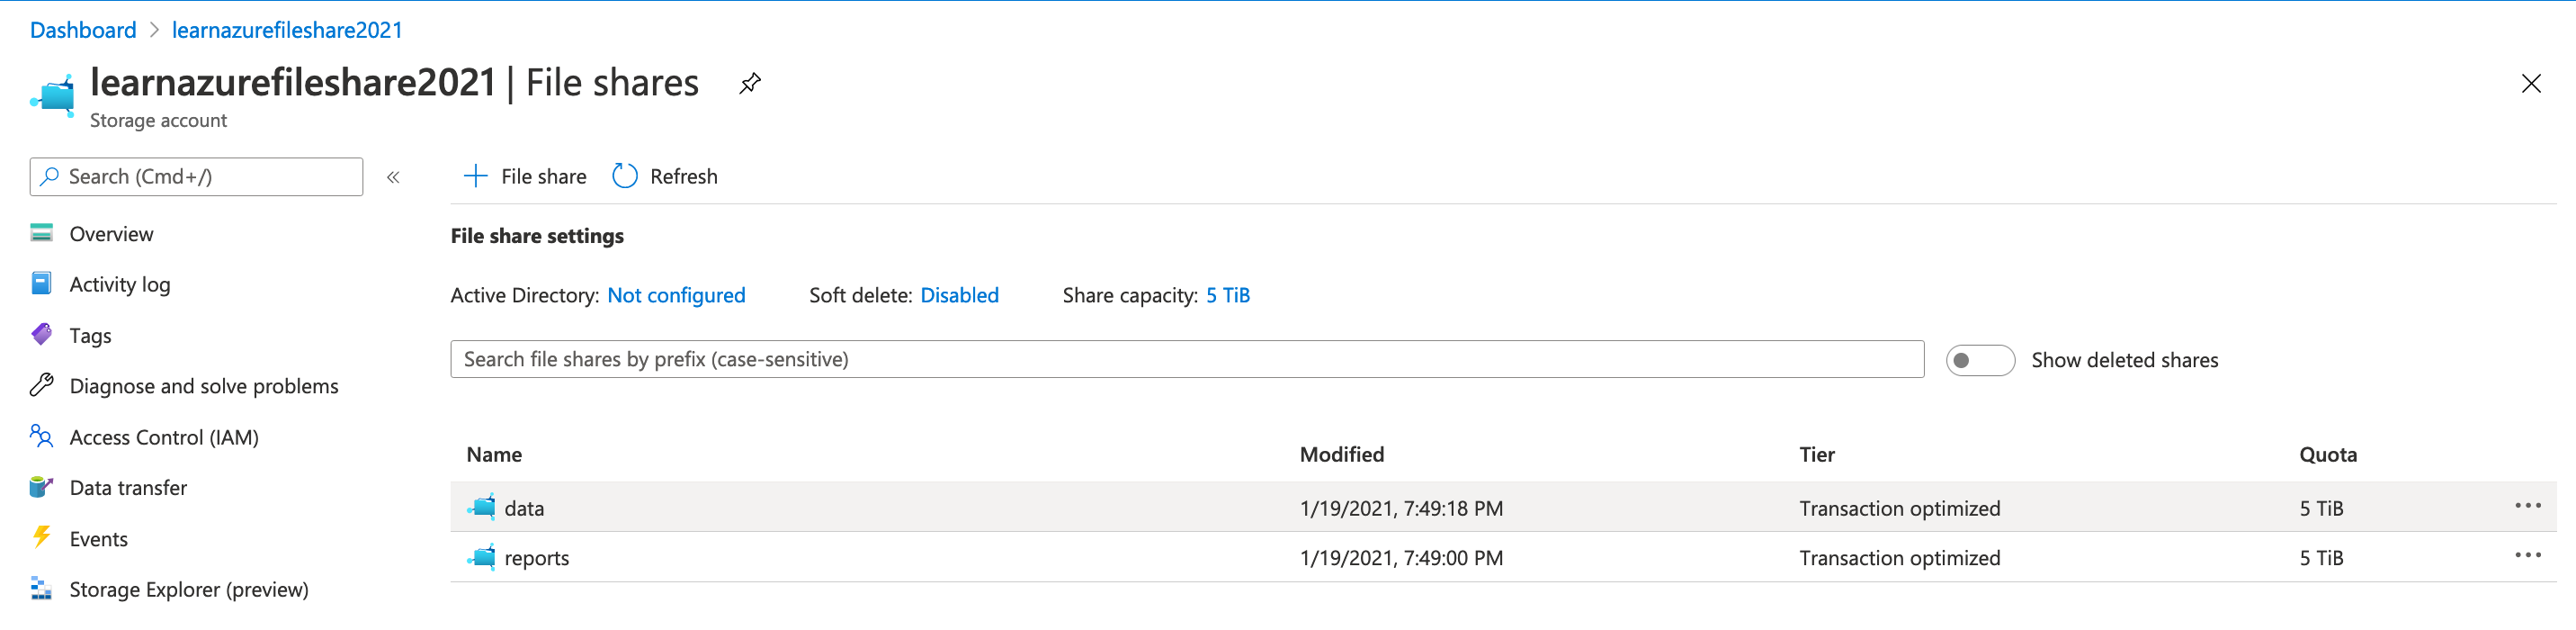
3. File Shares 선택 한 다음 data 선택 (이 data는 아까 만들어 놓은 File 이다)
4. Connect 선택하고 오른쪽 팝업 창에서 F 드라이브를 선택한 후 아래 표시된 powershell 명령어를 복사한다.
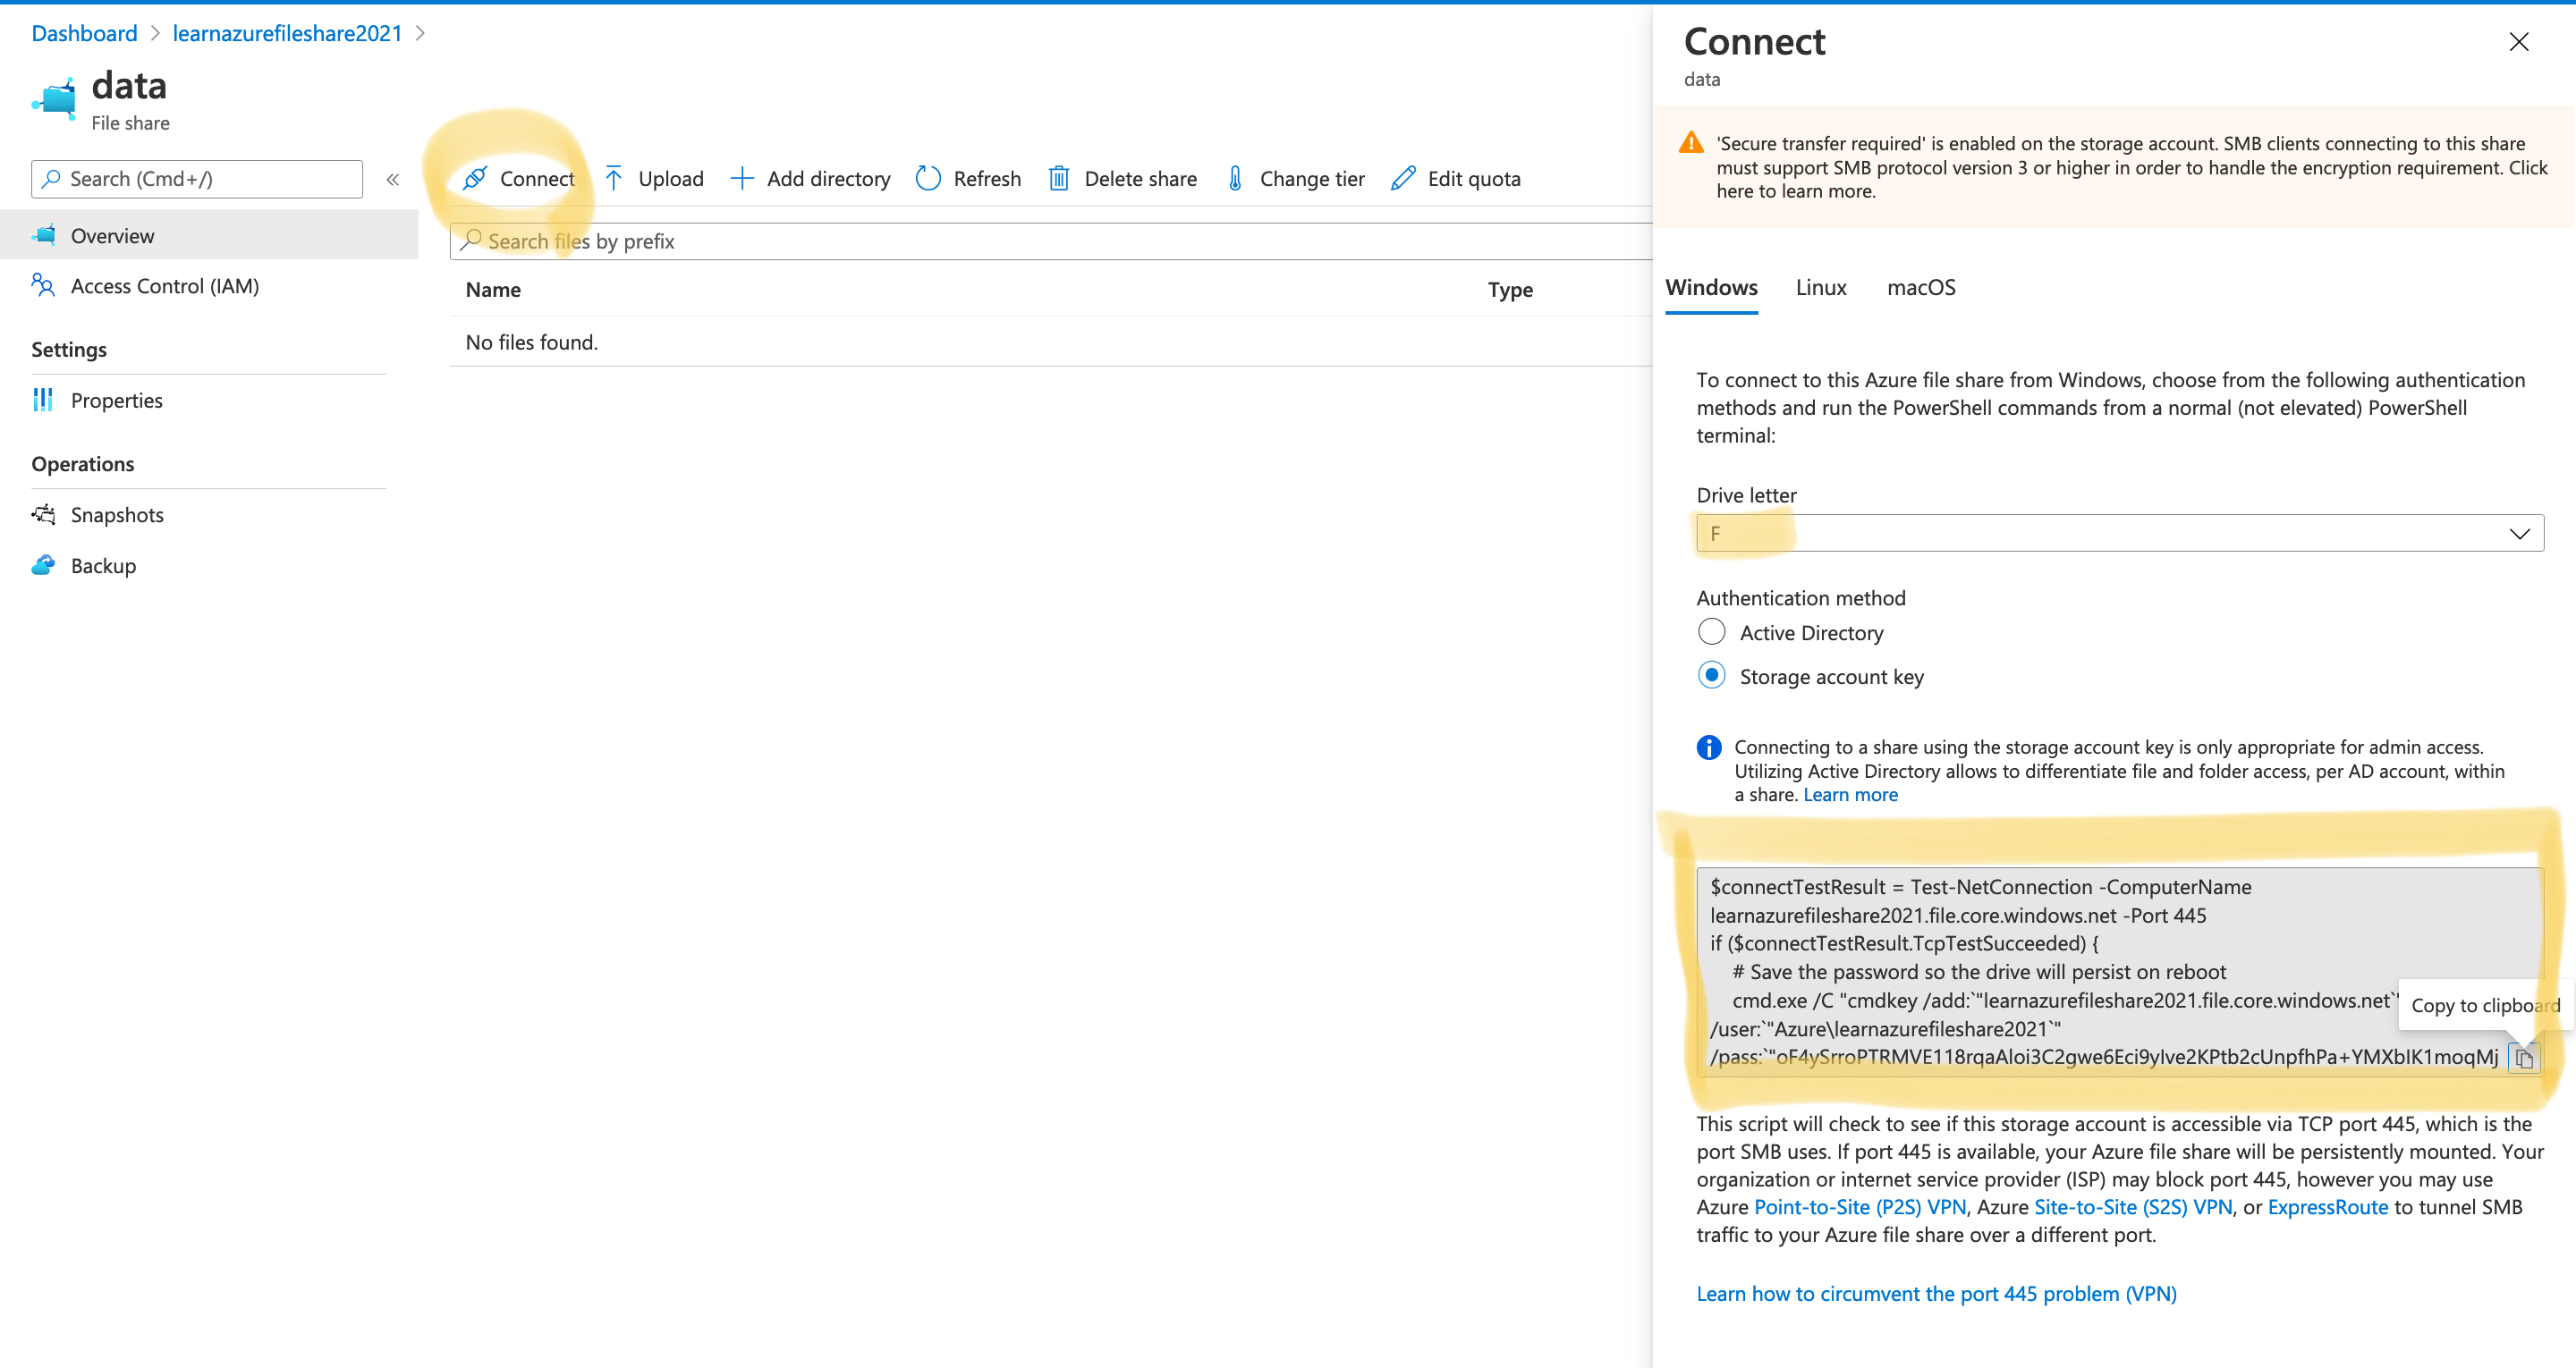
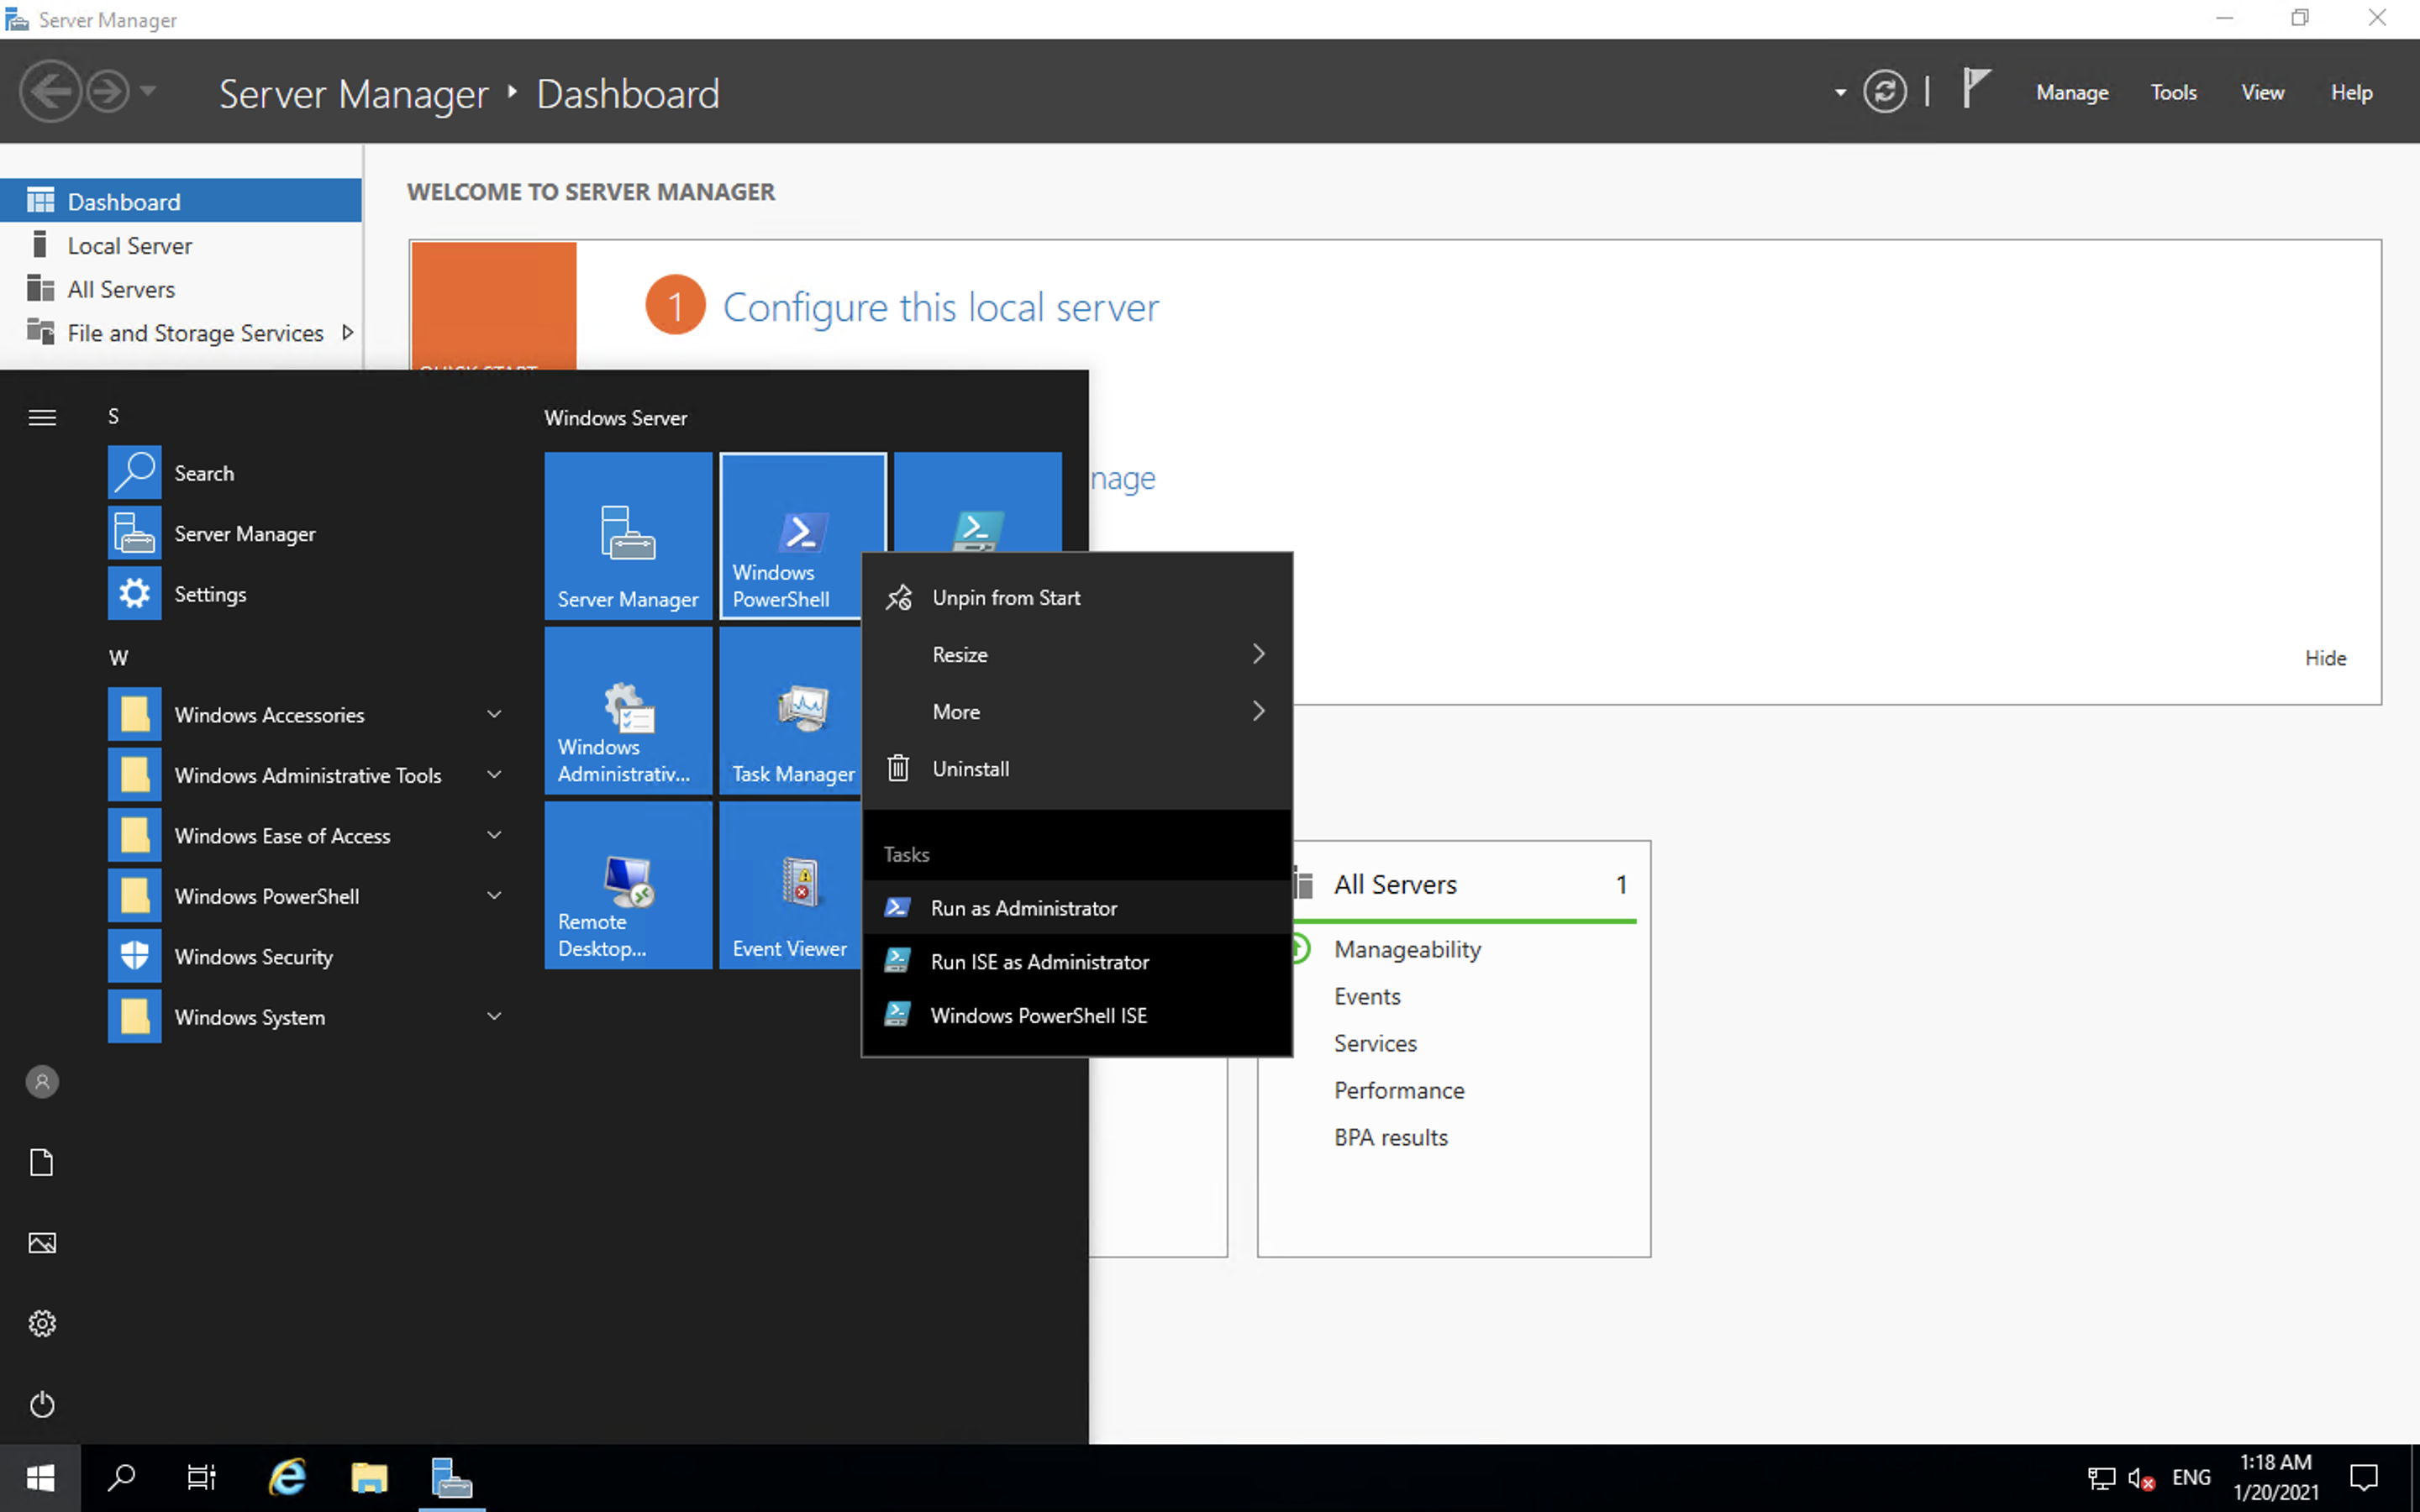
5. 윈도우 가상 머신에서 관리자로 window powershell실행
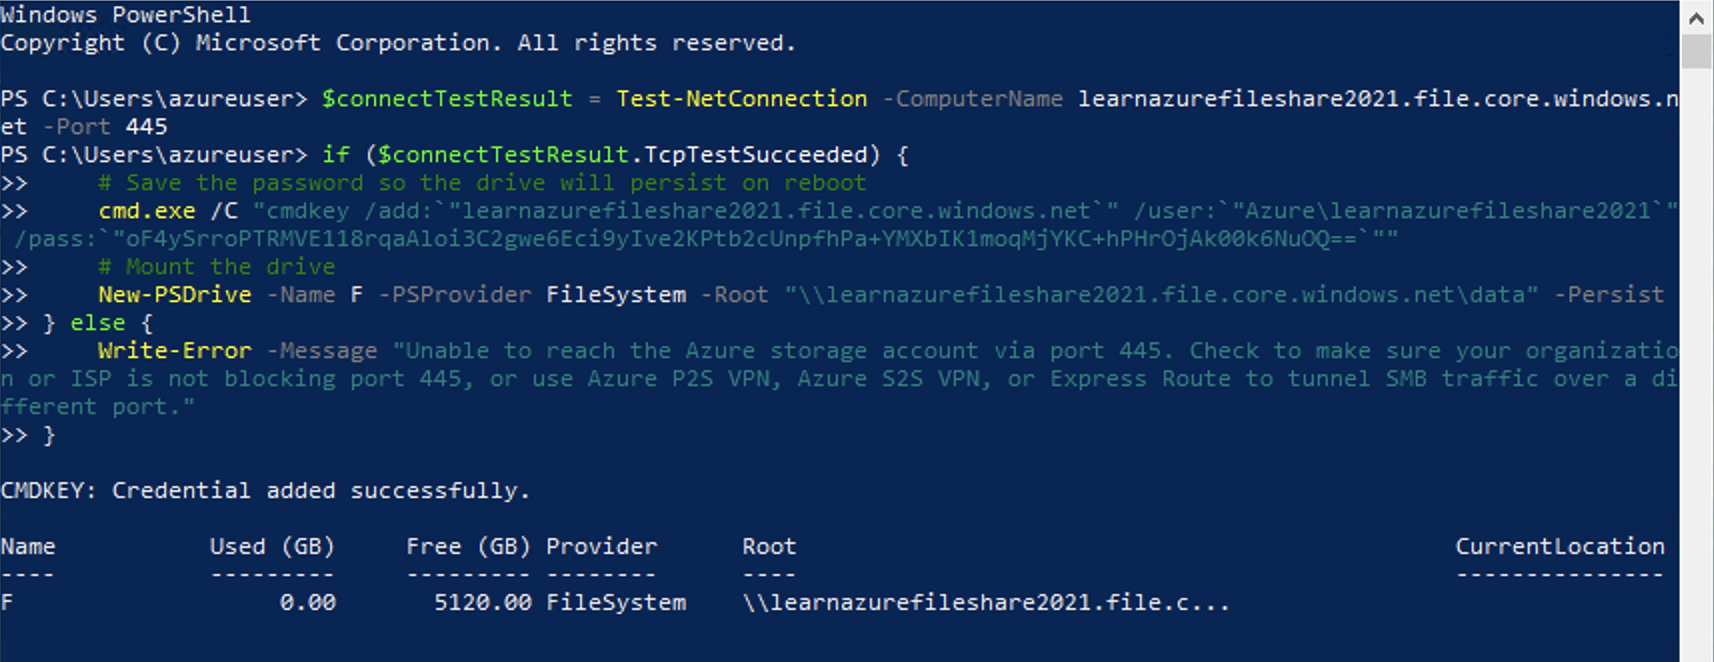
6. 4번에서 복사해 두었던 명령어를 Powershell cmd 에 붙여넣기 한후 Run
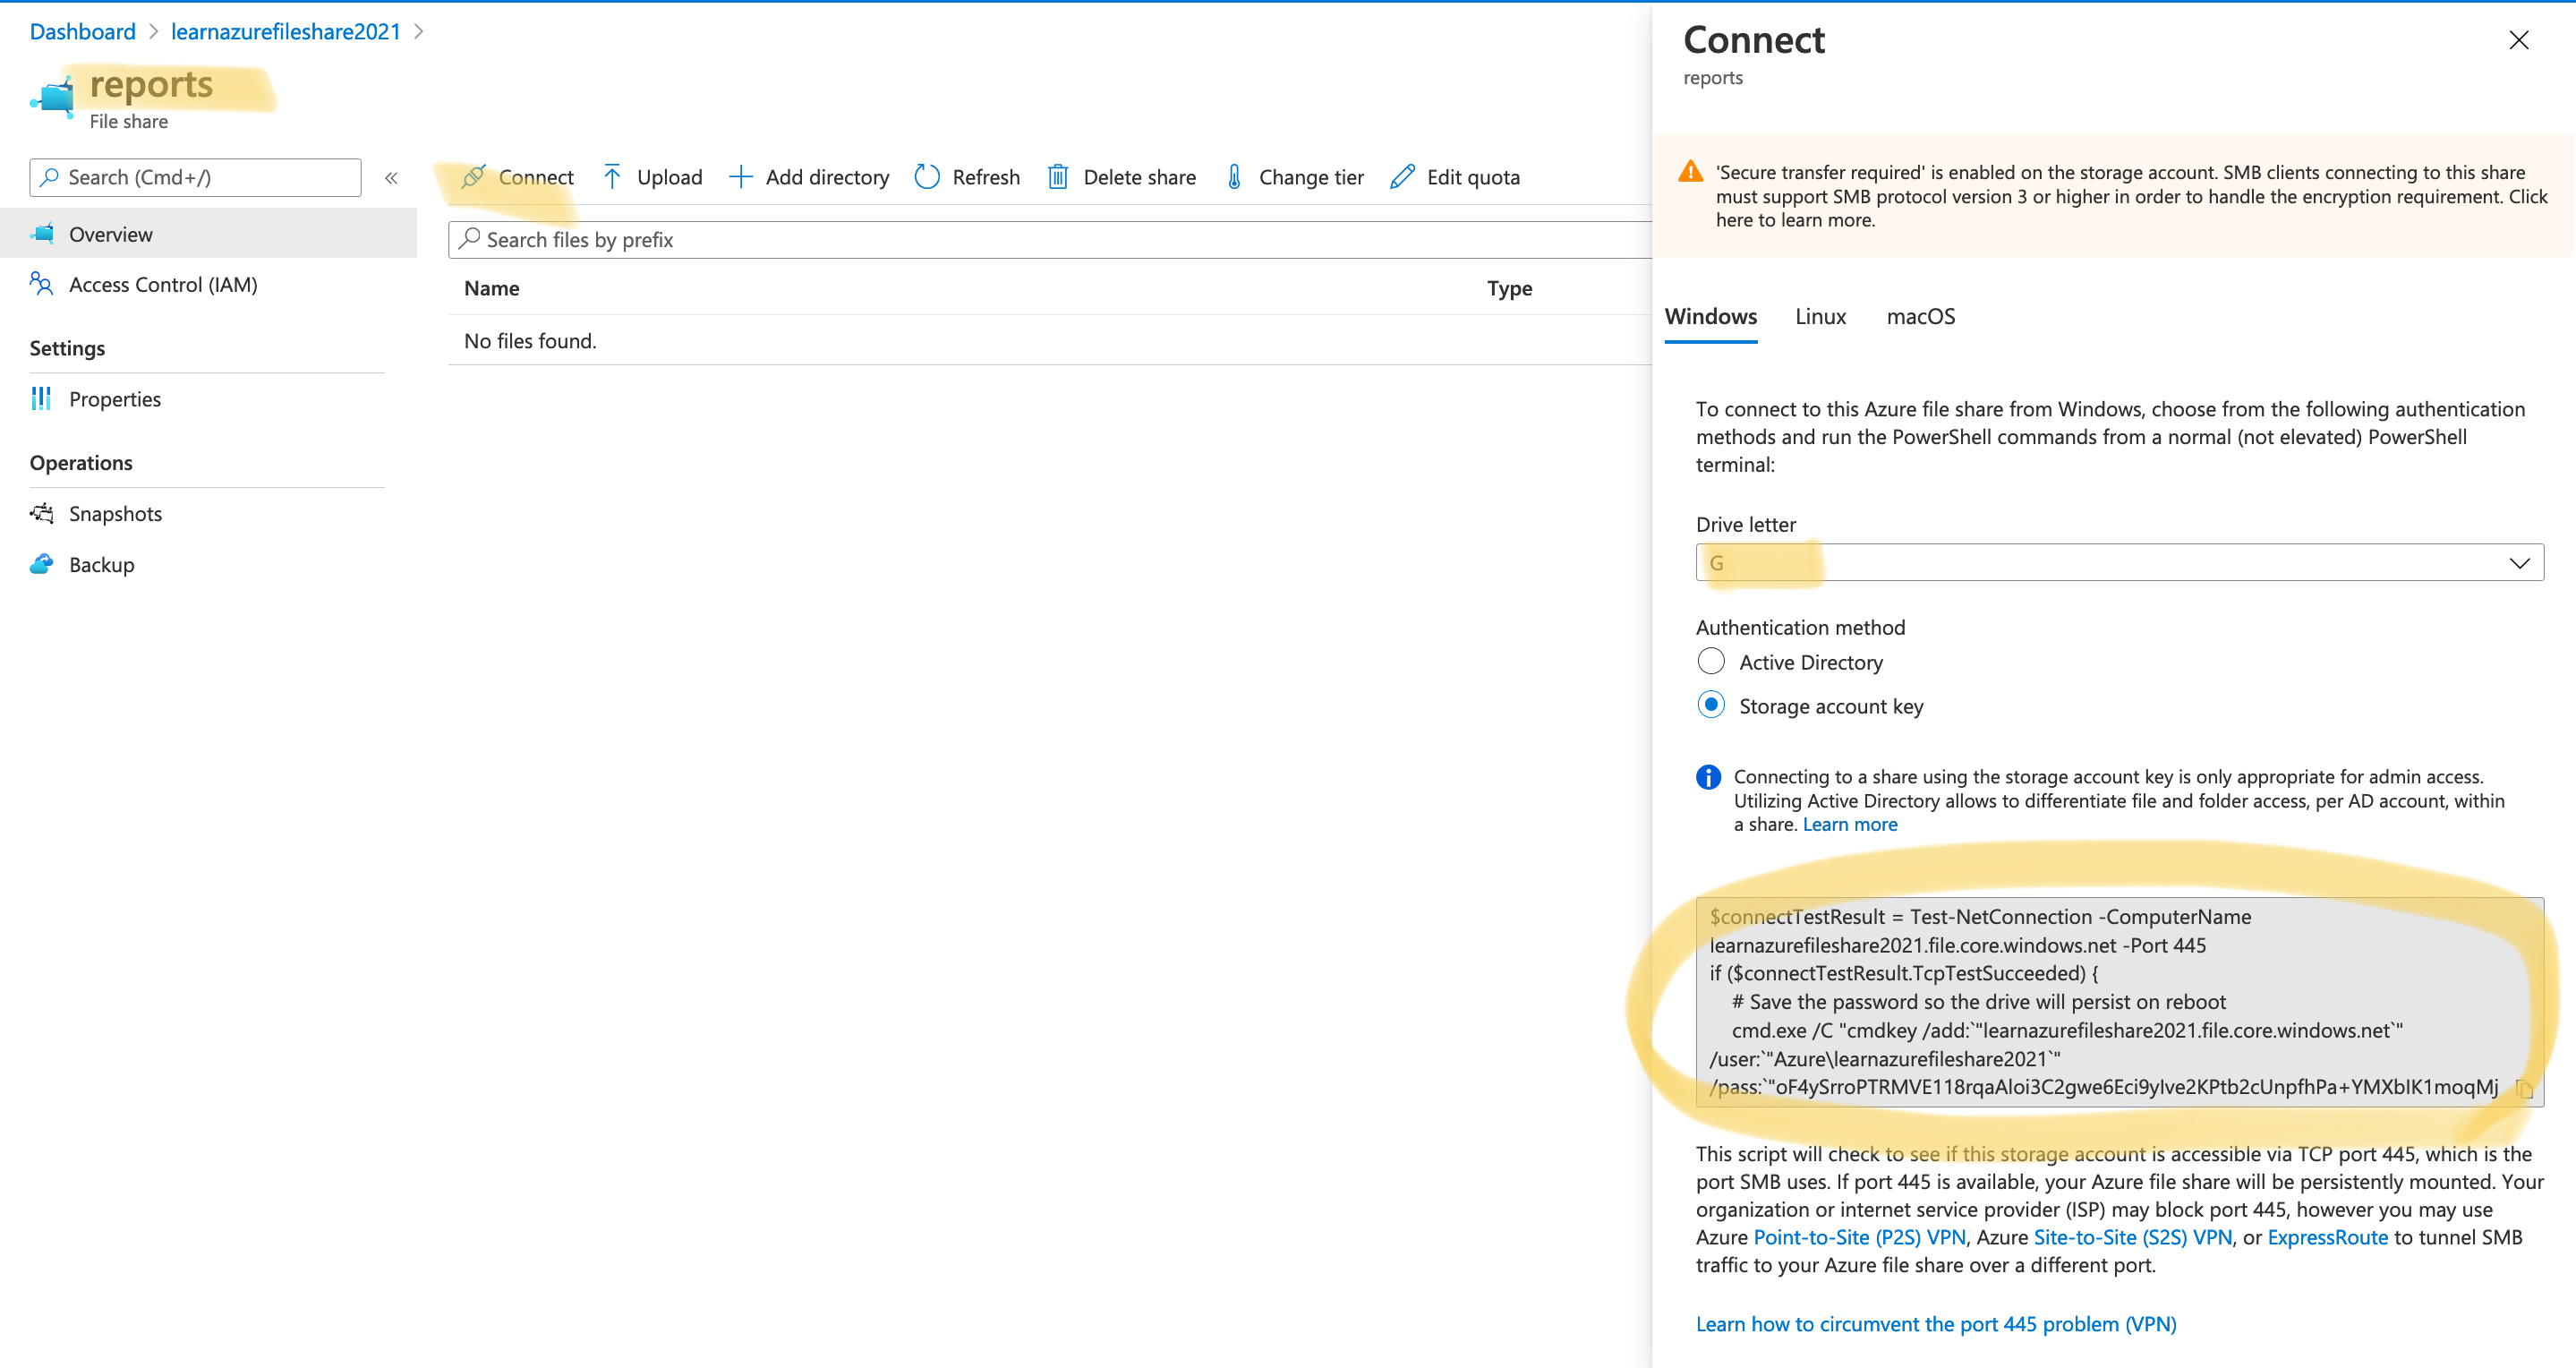
7. 위와 같이 reports 데이터도 File Shares 선택 한 다음 reports 선택 (이 data는 아까 만들어 놓은 File 이다)
Drive 는 G 로 설정하고 Powershell 명령어를 복사해둔다.
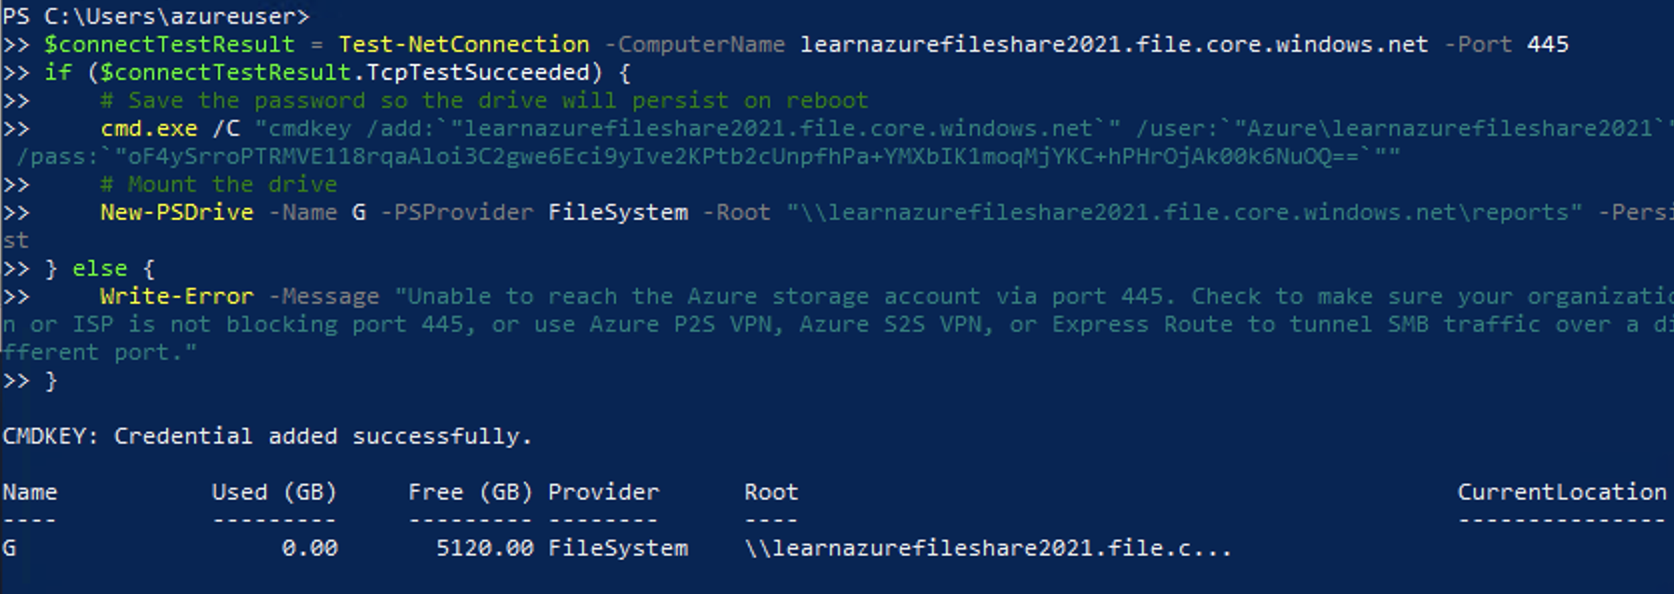
8. 7에서 복사한 명령어를 다시 윈도우 가상머신으로 돌아와 붙여넣기를 하고 Run
Test the mounted Drive
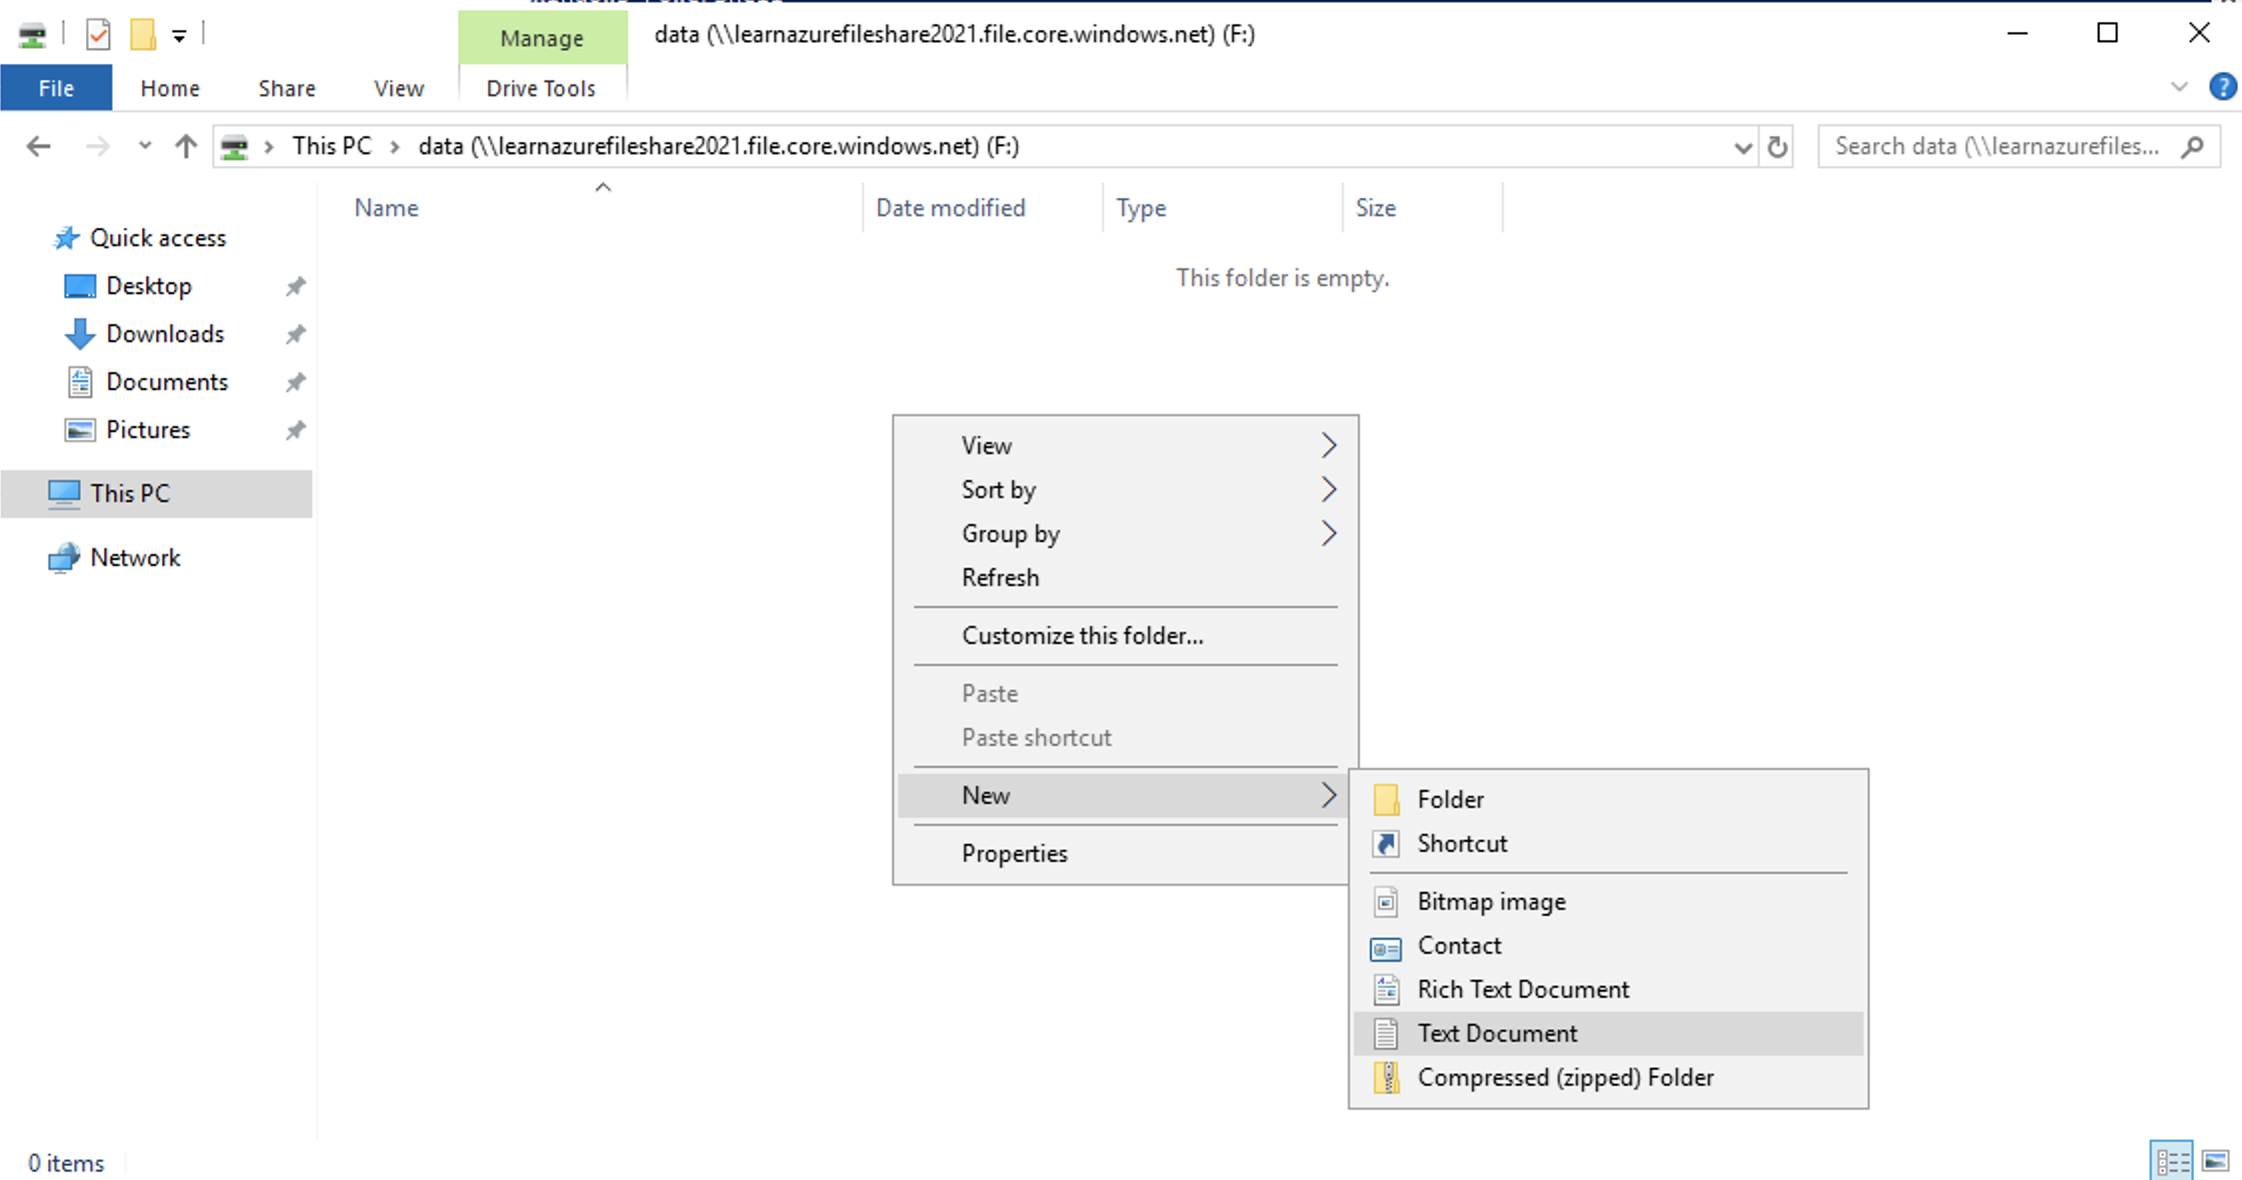
1. Window 가상머신에서 탐색기를 열고 This PC 선택
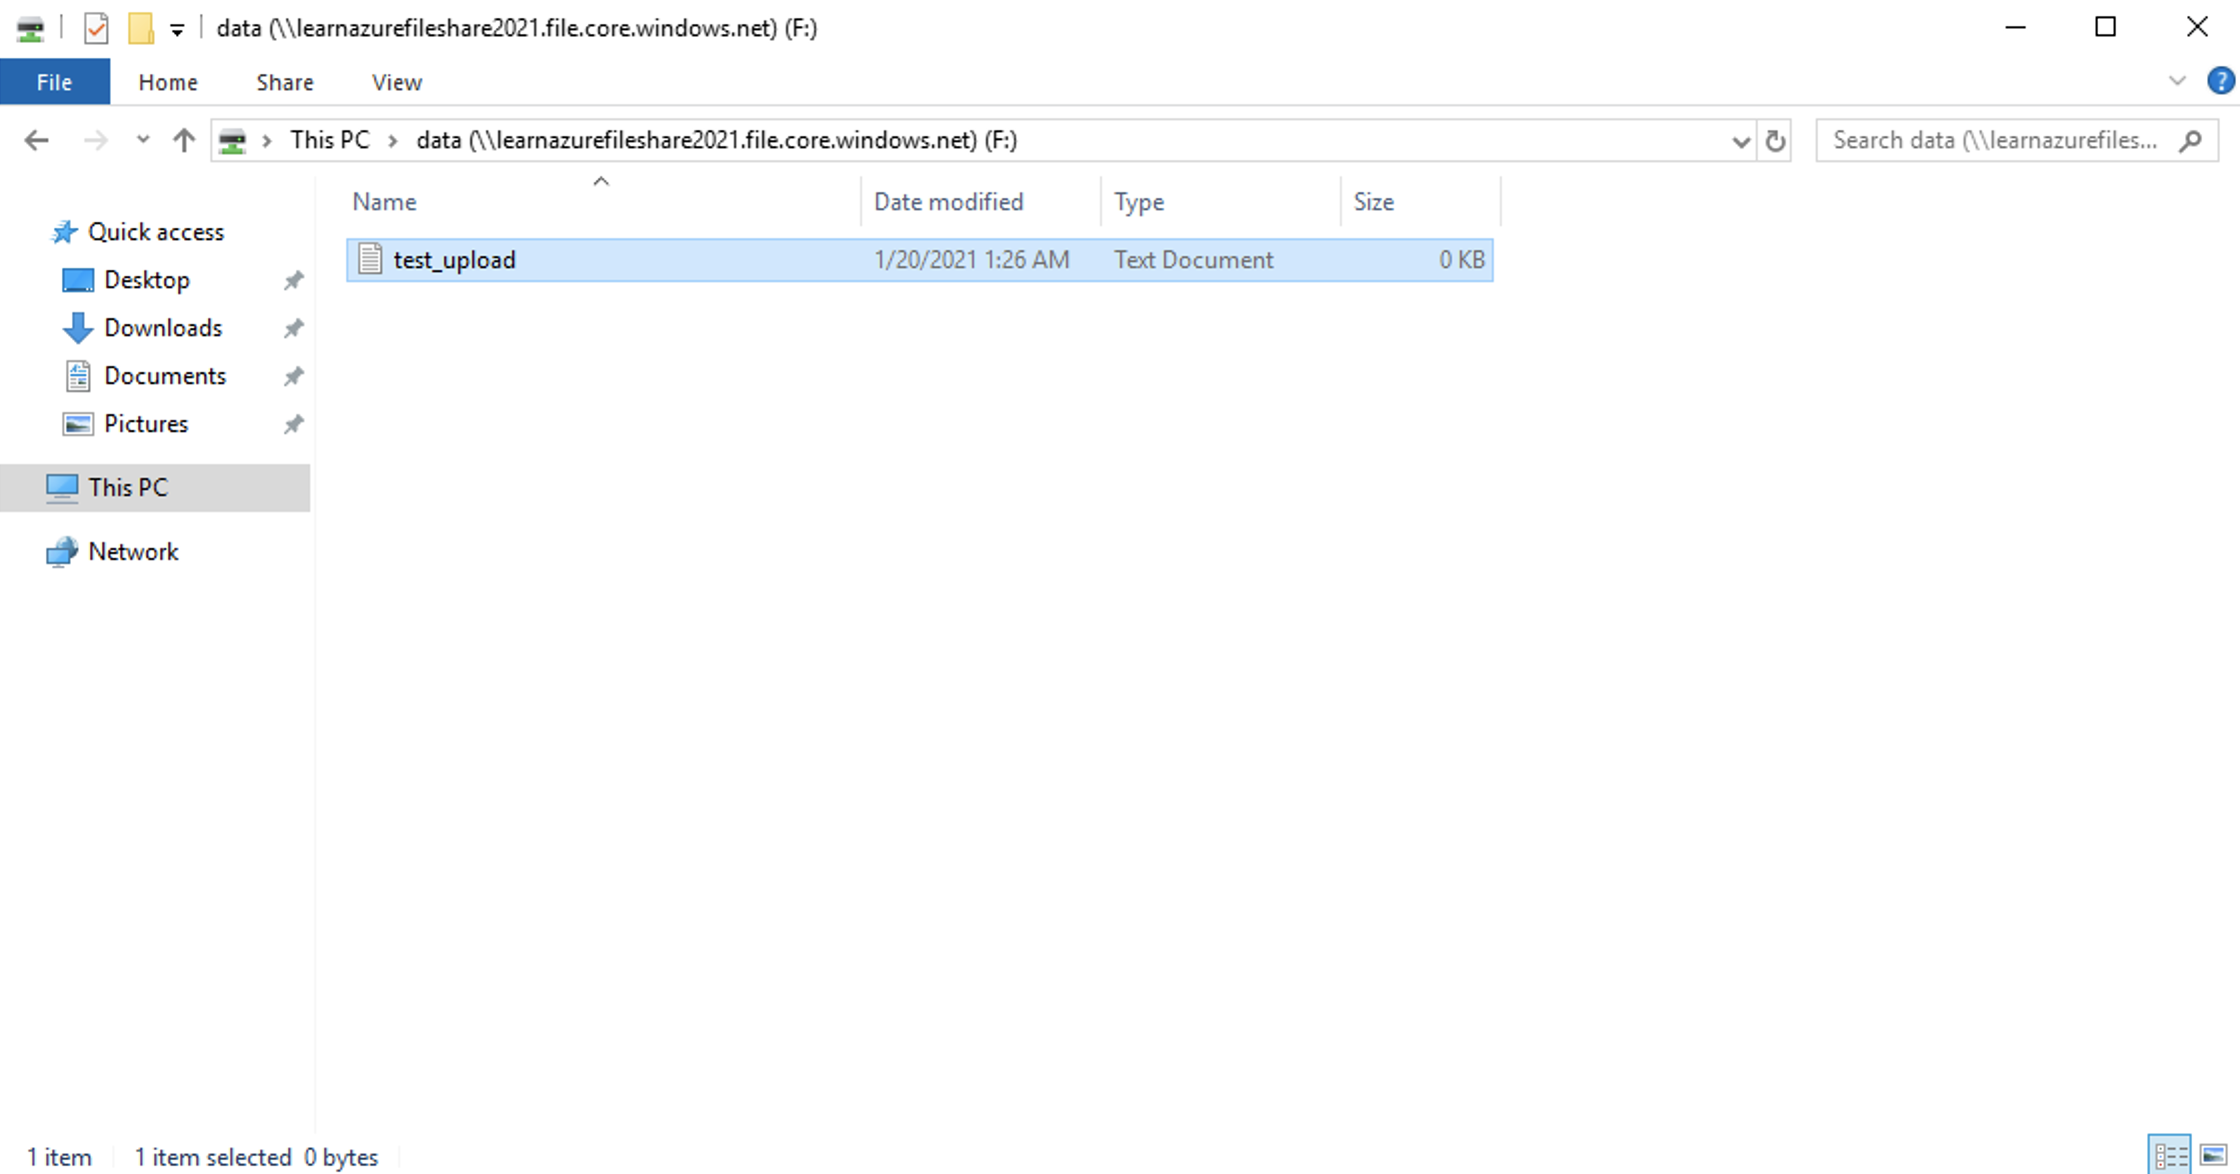
data 드라이브로 들어간 다음 table_upload 라는 텍스트 파일을 만들어 준다.
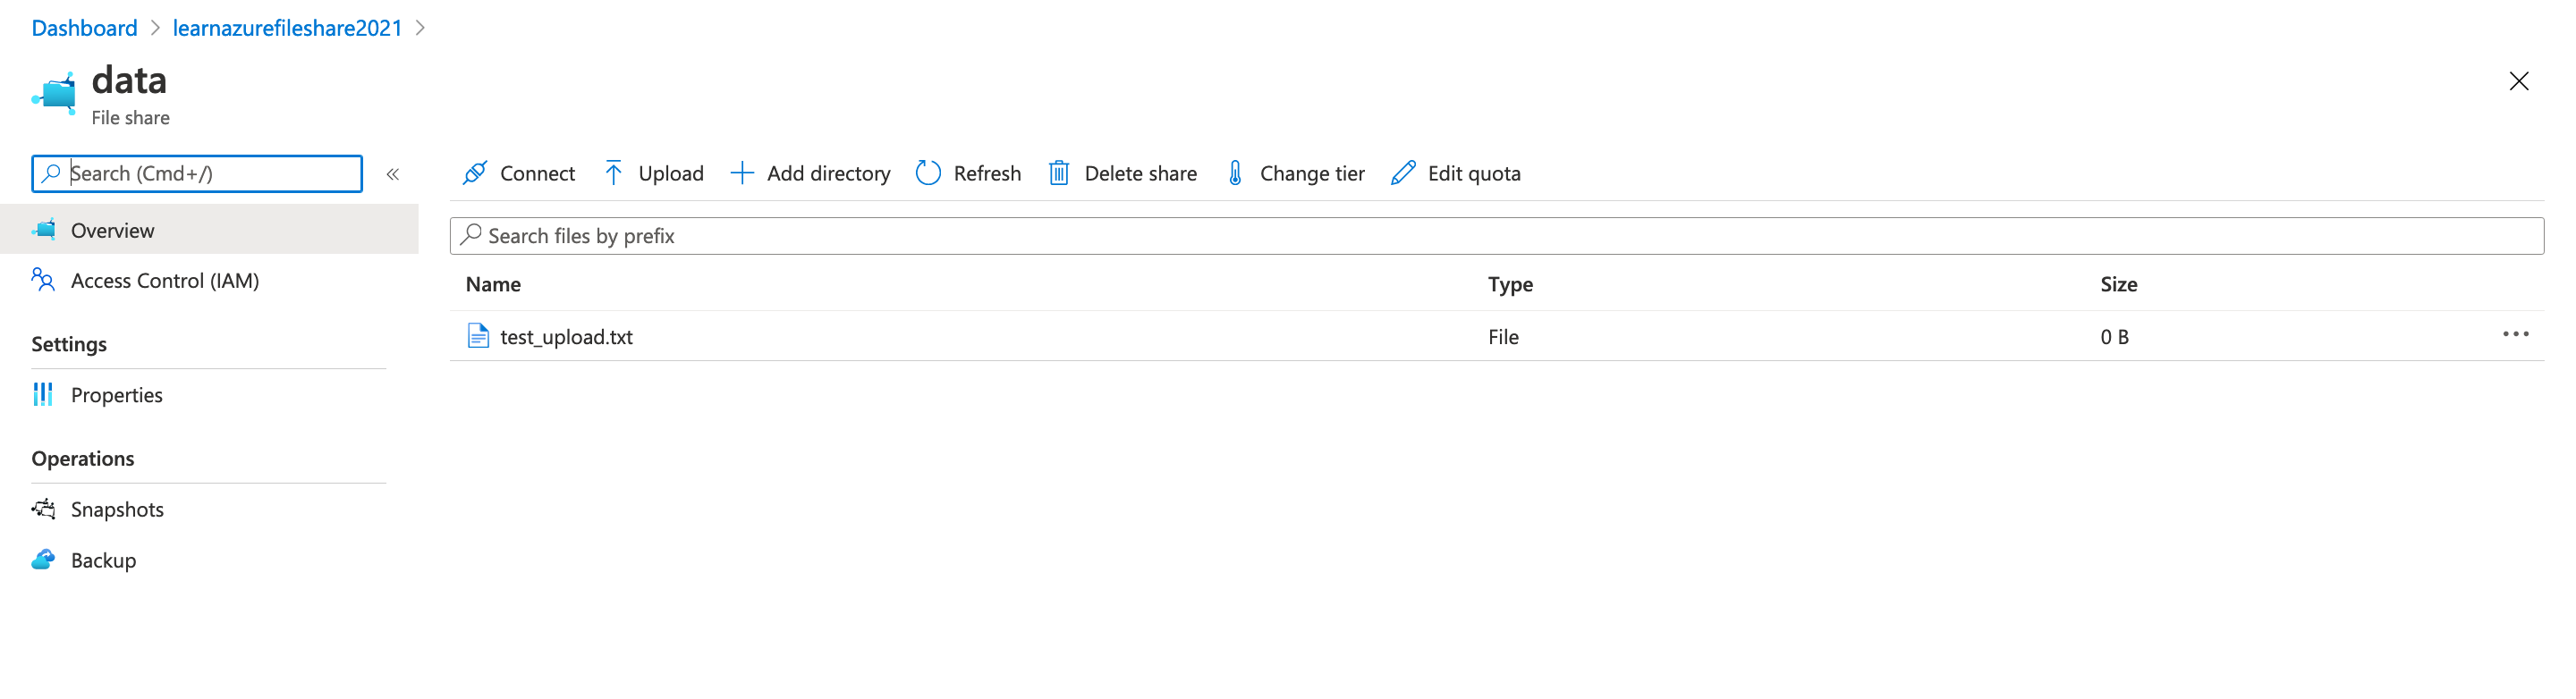
2. Azure Portal 로 다시 와서 data - File Share 로 들어오면 윈도우 가상머신에서 생성한 파일을 포털에서도 확인할 수 있다.
Enable secure file transfer
1. Azure portal > Storage Acocunt > learnazurefileshare2021 계정에 들어간다.
2. Configuration 을 선택한 후 Secure File Transfer 가 Enabled 되있는지 확인한다.

Azure CLI
az storage account update \
    --resource-group ResourceGroupName \
    --name StorageAccountName \
    --https-only true
Add a firewall rule to restrict access to an IP address
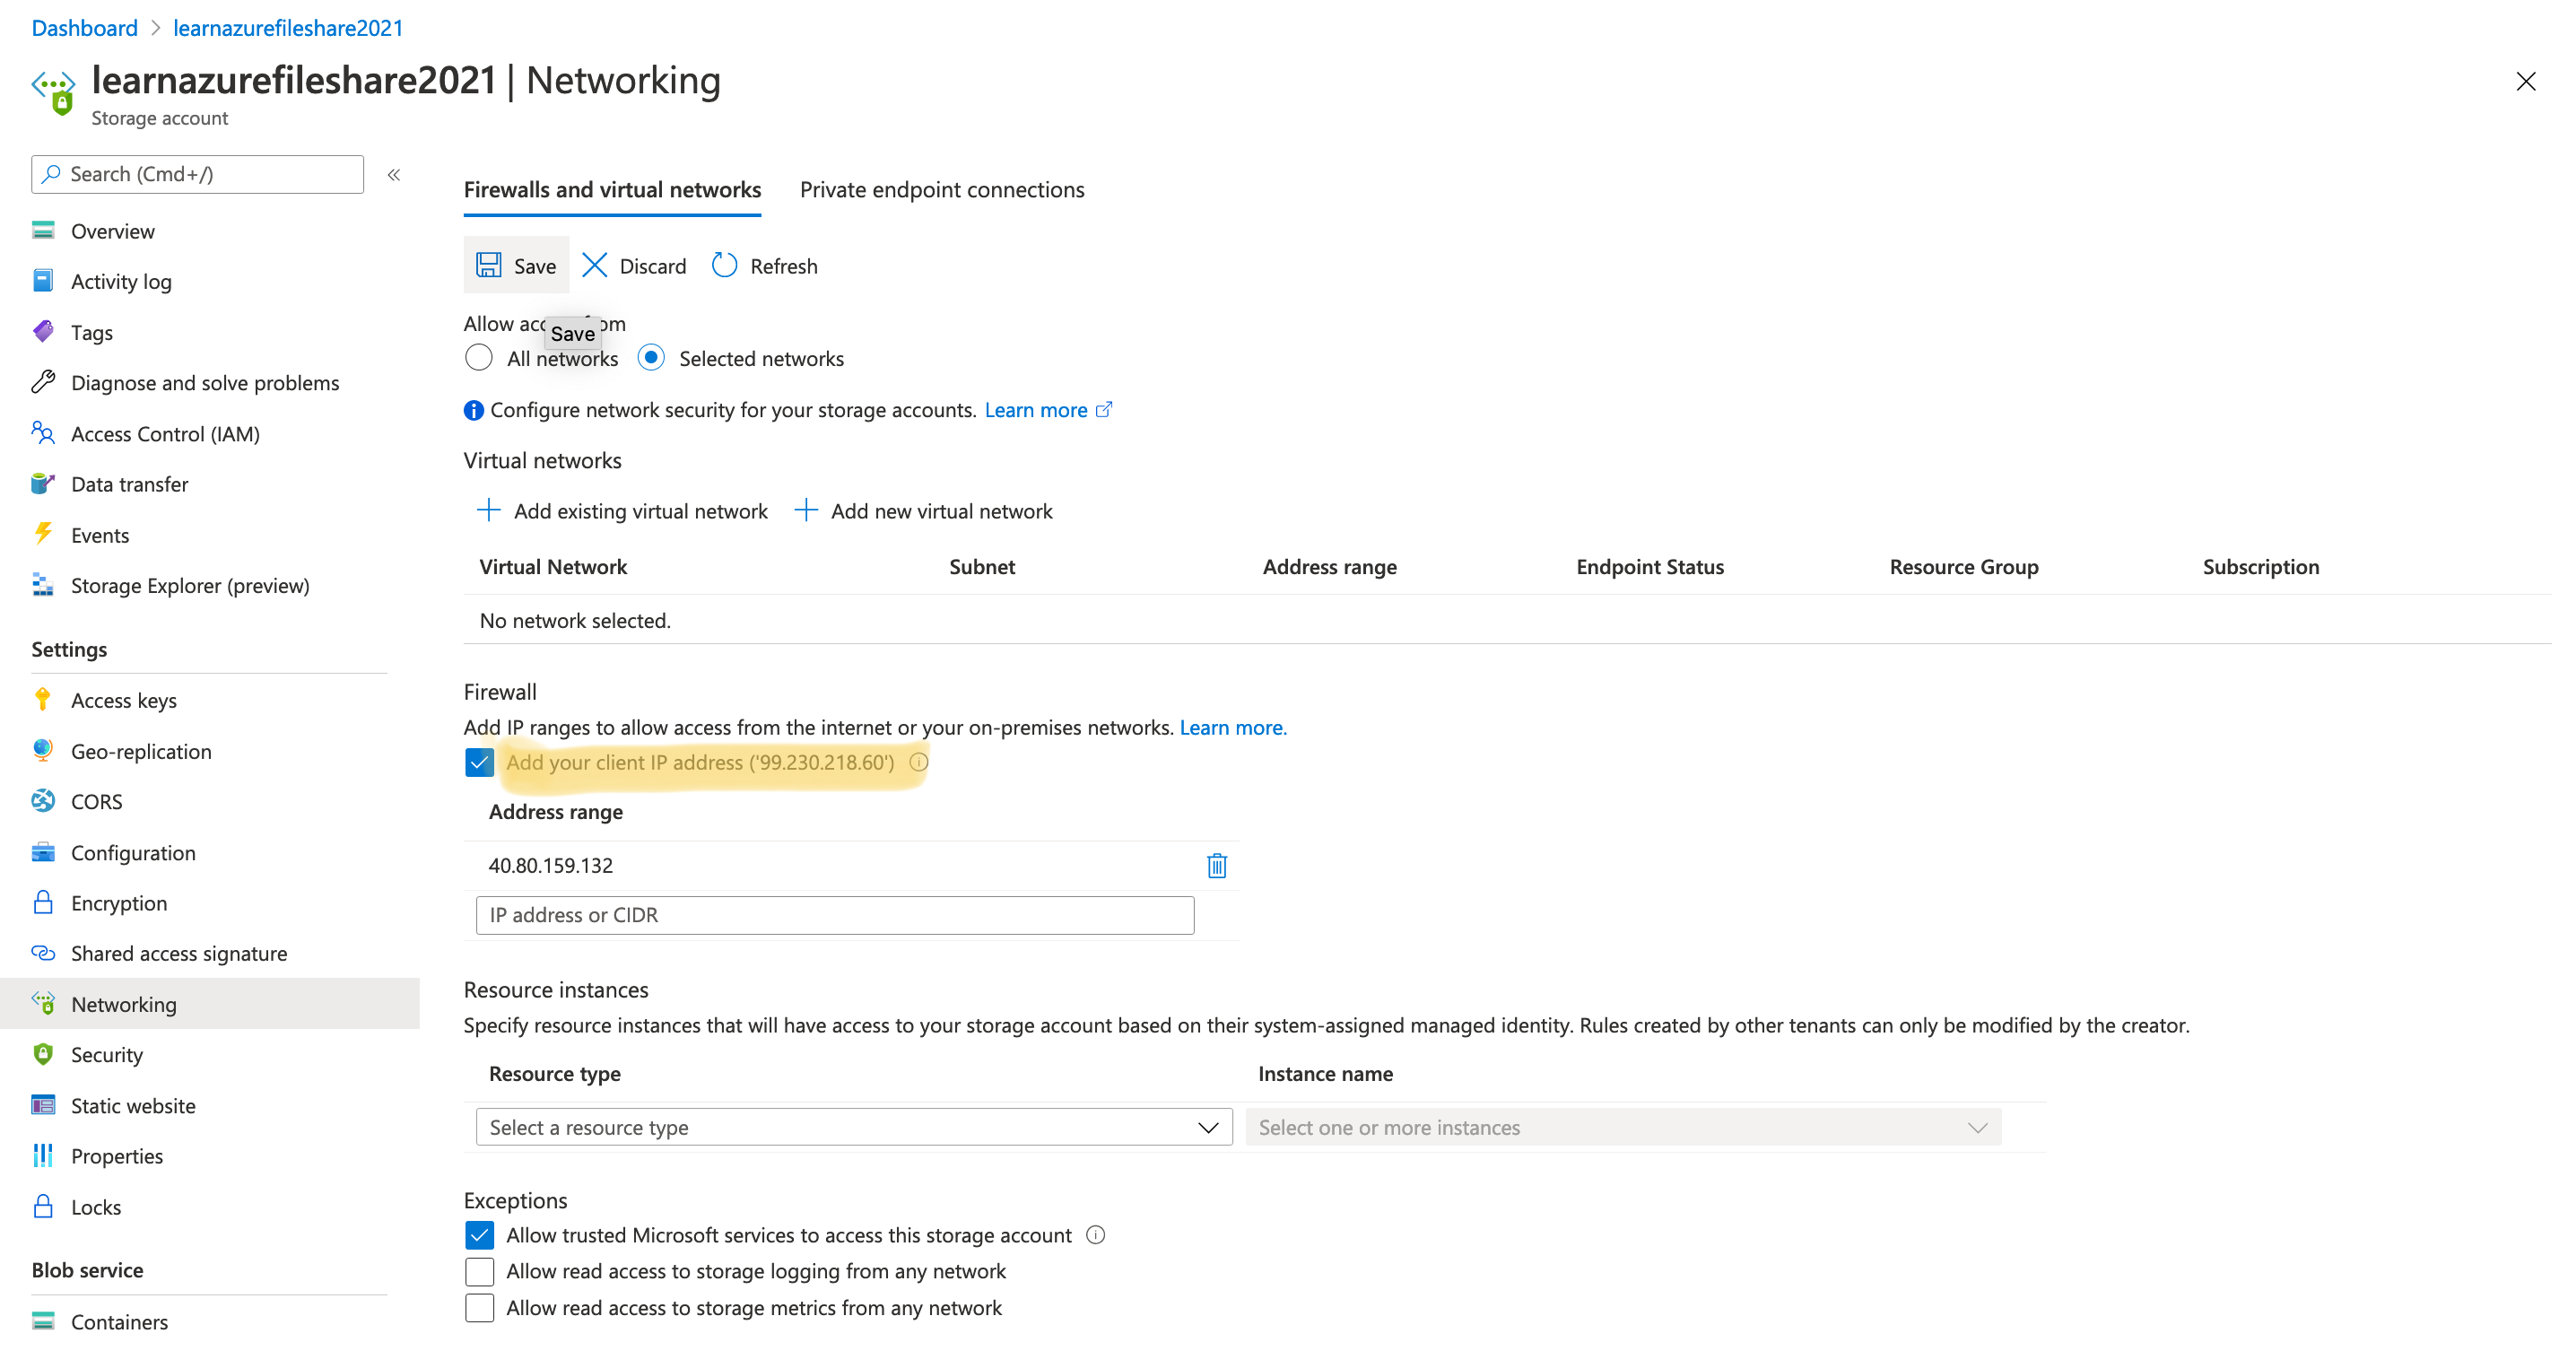
1. Azure portal > Storage Acocunt > learnazurefileshare2021 계정에 들어간다.
2. Networks 를 클릭한다.
3. Selected networks 를 선택한뒤 address range 에 윈도우 가상 머신 public IP 를 입력한다.

4. Save 눌러서 저장
Azure CLI
az storage account network-rule add \
    --resource-group "myresourcegroup" \
    --account-name "mystorageaccount" \
    --ip-address "NNN.NNN.NNN.NNN"
Test security of the file share
1. Azure portal > Storage Acocunt > learnazurefileshare2021 계정에 들어간다.
2. File Share 클릭

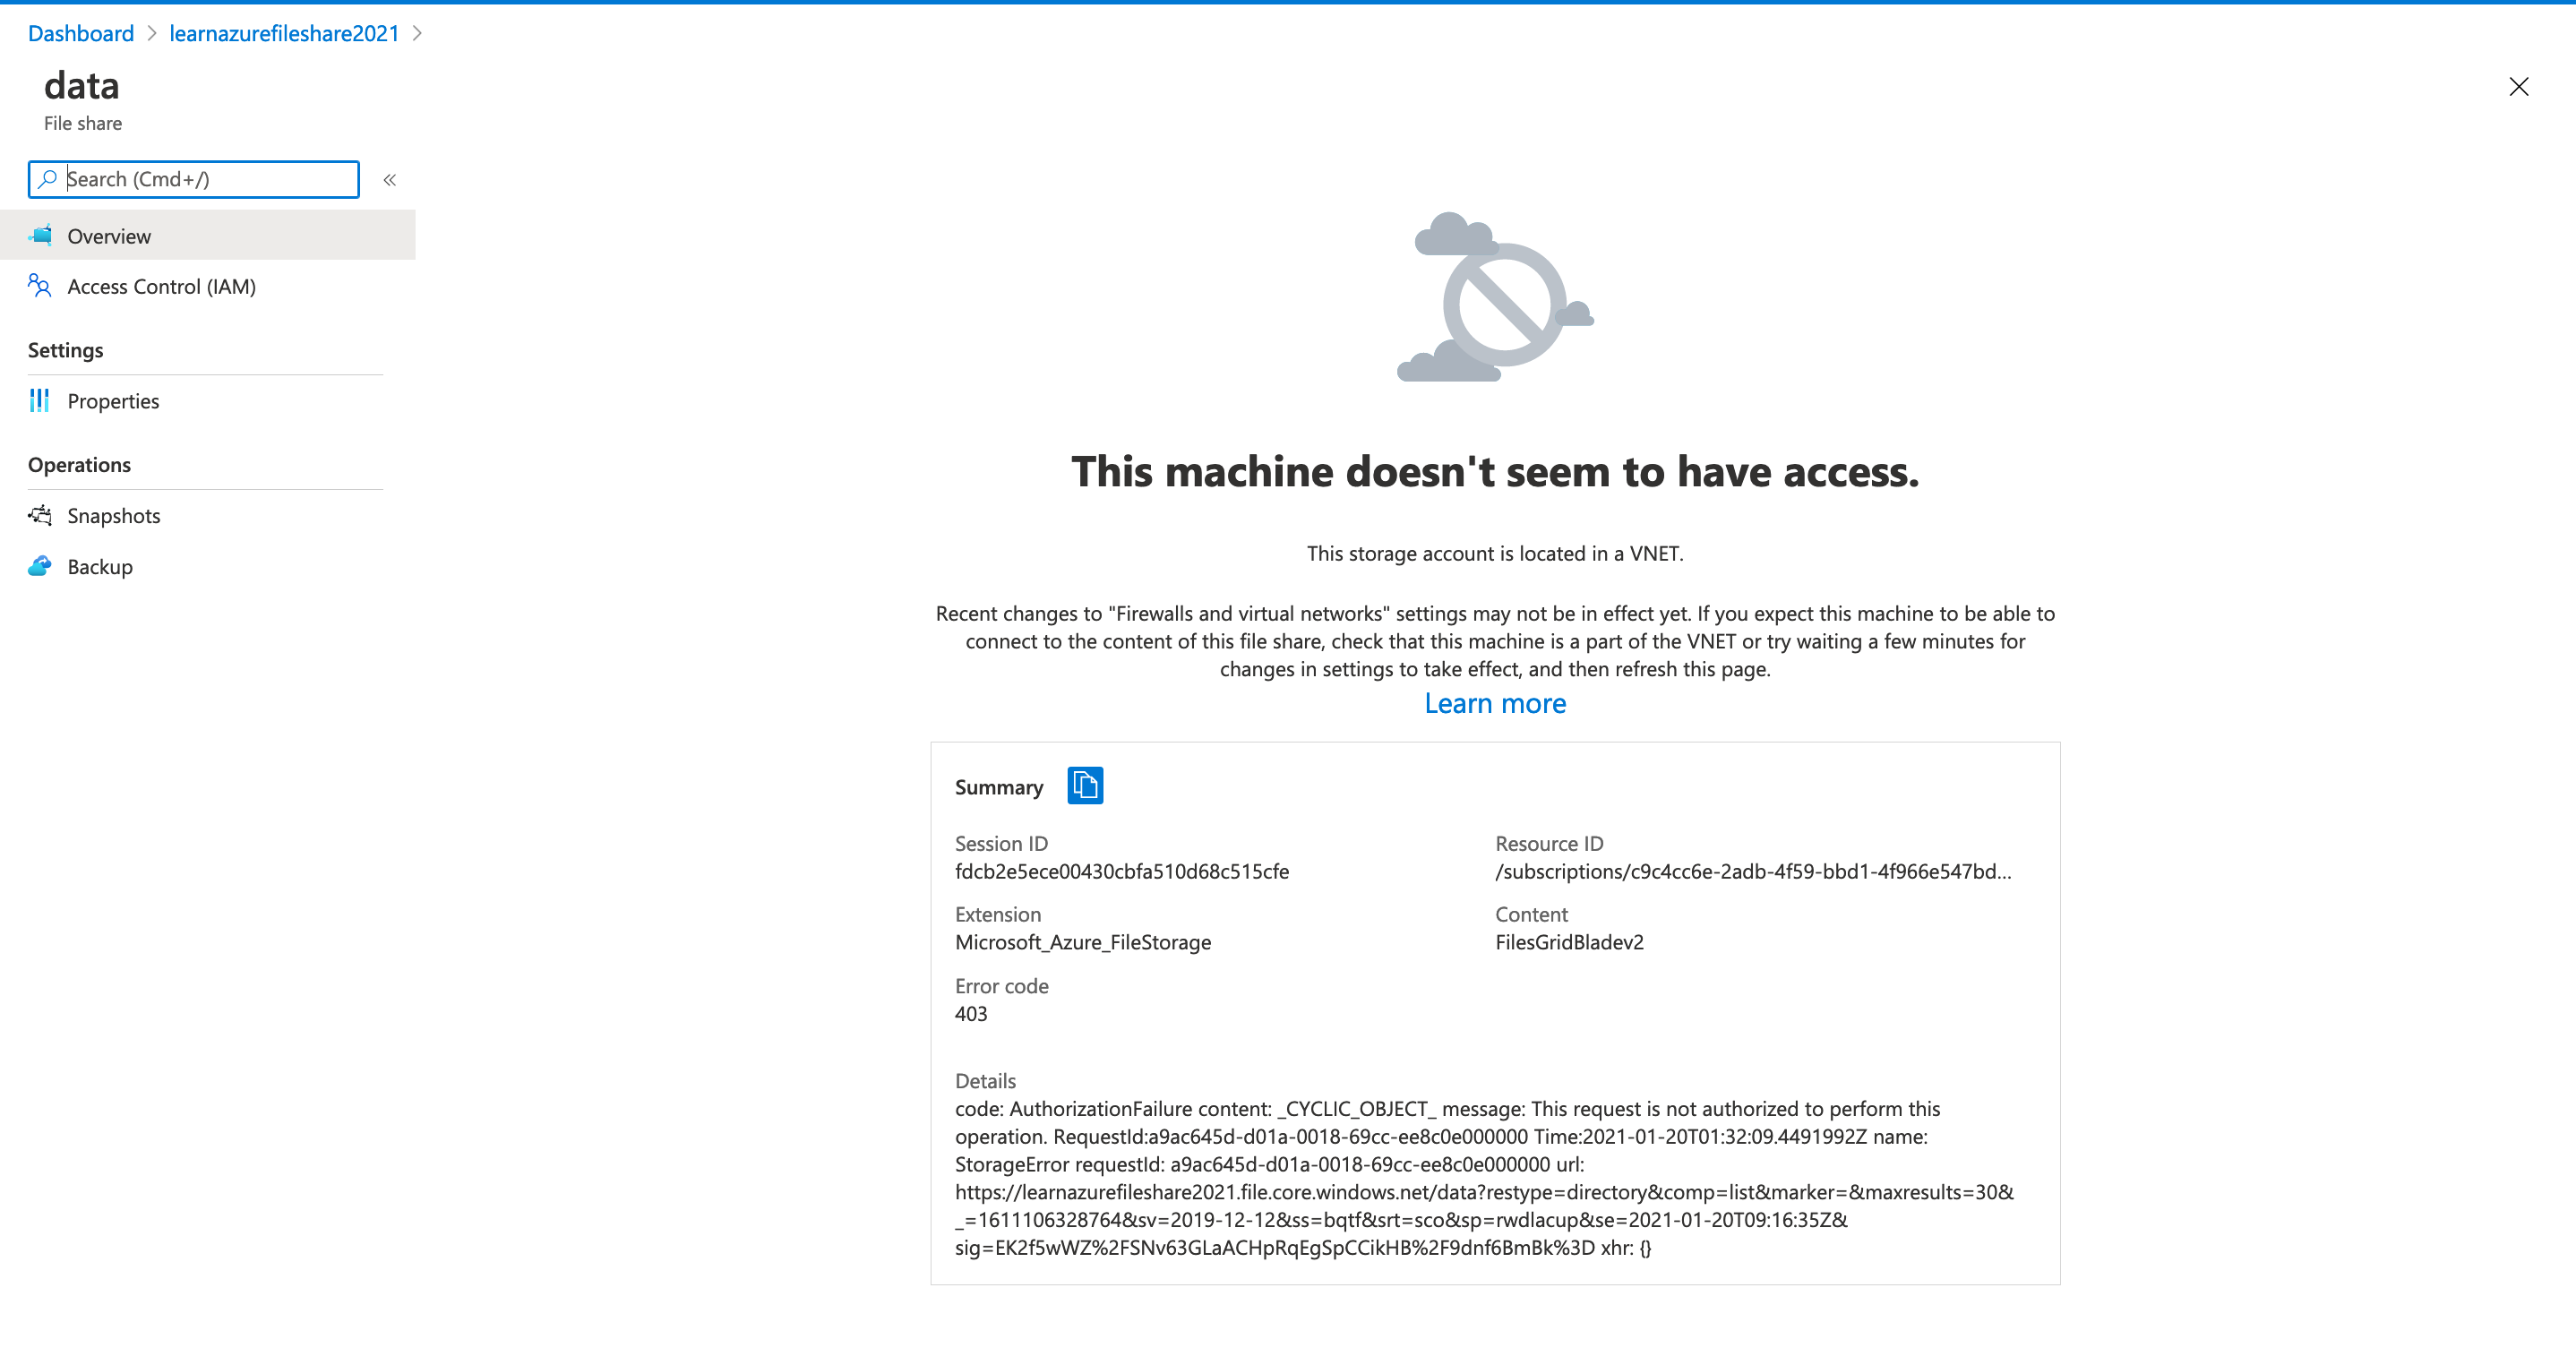
3. data 나 reports 데이터로 들어가면 엑세스가 거부되는 것을 알 수 있다.
4. 다시 portal 로 와서 : Storage Acocunt > learnazurefileshare2021 계정에 들어간다.
5. Networks 를 클릭한다.
6. add your client IP address 체크박스를 선택한다.
7. 다시 Azure portal > Storage Acocunt > learnazurefileshare2021 계정에 들어간다.
8 . File Share 클릭 > data 나 reports 데이터 클릭 , 이제 파일을 볼 수 있다.

Reference
연습 - Azure Files 공유 만들기 및 연결 - Learn
연습 - Azure Files 공유 만들기 및 연결
docs.microsoft.com